
- Popular Post


WHITESNAKE01
-
Posts
129 -
Joined
-
Last visited
-
Days Won
4
Content Type
Profiles
Forums
Store
Events
Posts posted by WHITESNAKE01
-
-
Hi all,
As announced on the website of Toys Farm Farm Toys, Italian based ROS is bringing Limited Editions of these tractors in 2022;
- Hürlimann H6136:

- Lamborghini 1506-T:

- Lamborghini 1706-T:

- Same Laser 130:

- Same Laser 150-T:

- Same Galaxy 170T:

Pictures courtessy of Toys Farm Farm Toys.
Best regards,
Jan-
 4
4
-
-
Hi all,
Thank you guys for your replies! Hope you enjoy what's being produced!
The next challenge were the steps. Made of square tubes in real life, but i didn't have anything which suited that. So there's nothing left (again....) to scratch something, and to be honest: it really isn't that hard. You just take a piece of round iron wire, thick enough, two hammers with one of them in a vice, and a great part of patience and a sharp view to produce your own square rod. The individual steps i've made of a narrow strip of plastic mesh material i purchased to make a realistic grille for my Caterpillar D8H (maybe i should open a Post on that one someday....🤔).
Some images of the process:


Glueing them to the bottom of the cabin, i realized they're mounted in a small angle, so that ultimately had to be done in the latest step.

Scratch-made mirrors don't function without a real (looking) mirror-glass off course, so that part was done also today:


A tiny piece of a chromed sticker i once saved for issues as this! 😉
Perfectionism will pay off in the end........🤣
Have yourself a nice weekend!!
Best regards,
Jan
-
8
-
-
On 1/23/2022 at 8:01 PM, justy 46 said:
About 3 weeks. Longest part was stripping the paint and maybe 6 days waiting on the few bits from Dave. It was not time consuming to be honest. Could probably have turned around quicker if I wanted to. 😁
Hi,
Can i just give you a tip in what paint stripper i'm using?
I've been struggling this subject years ago, using paint strippers from the lumberyards, but this quality just sucks. 😡So i finally found me a much better solution for this: i visit the local car damage repair company, and ask them to sell me just about a liter or so from the paint stripper they use. And thát is form a professional quality, and thát is what one remarks!! The paint is off in minutes!!!! But beware: only to be used on die-cast-models. Any plastic will be useless after it gets in contact with this liquid.........
Just to give you an idea, here's a YouTube-video i once made:
Best regards,
Jan
-
1
-
-
- Popular Post
- Popular Post
Hi all,
As time goes by, the process is moving forward. In fact, in real time faster than in the version on the Forum here 😉
Some images to show:


The front-axle was originally a four-wheel-drive, but the one i'm building / adapting is meant to be two-wheeldrive.
So the front-axle needs to be replaced, also by a version supplied by Artisan32:


But since these tyres are too wide according to my whish (ánd memory), they also need to be replaced.
And here again Artisan32 has the needed versions:


The same goes for the rear wheels:

Whether you might get the idea i have some shares in Artisan32: no, i haven't! 😉🤣
Th grille in the right setting and color went to look like this:


And "dry-fitting" the interior, it occurs that a decent dashboard is needed also:


Last bit for today: the cab is supplied with glazing, used from a package in which was somekind of toy. The rear window has to be in an opened position and therefor needs gas-struts, as did the roof-hatch:


Just to give you an idea about the size, a match is laid aside.

And, what's a cabin without a radio in it???


To be continued.
Best regards,
Jan
-
14
-
On 1/29/2022 at 4:50 PM, Stabliofarmer said:
Looking great so far Jan, what primer are you using in your airbrush?
Hi James,
I'm a big fan of all products of Zero Paints, located somewhere in the UK, but supplied by a local Dutch supplier over here.
They make a wide range of colors, and are increasing their products in the "agricultural" and "earth-moving"-equipment!
All pre-thinned and ready-to-use from the bottle! Although this white primer i just thinned a bit more.
Here's their website: https://www.zero-paints.com/
Best regards,
Jan
-
 1
1
-
-
- Popular Post
- Popular Post
Hi all,
And we continue our journey with adaptation of the cabin. The original one is really quite simple, so it needs a re-configuration: a roof hatch which is opened, as well as gas-struts to it, and hand-rails on the inside to get in and out comfortably. Glazing had to be applied, but this is done after painting. The inside of the cabin also needs a canopy. Pictures show the process:


I didn't like the grille in the bonnet at all, it simply was a sticker, so again i was triggered to make a more realistic version here:


And so, after some real "modelling activities", we're ready for primering, put on by airbrushing:


To be continued.........
BR
Jan-
12
-
Hi again,
And as we continue, the first thing to build, but not on pictures here to see, was the rear hitch and drawbar. This was made from a kit from Artisan32, a French company which makes a lot of stuff one can use for building and detailling agricultural models. The version i've used was this one:

To make a toy change into a serious scale-model, this is a first priority i.m.h.o.
Then there's this issue about the interior of the cab, there's simply nothing in it which is like the real thing. So there's a lot to do!


And i hope it's quite obvious to see, but i'm a BIG fan of details! It's sometimes really hard to do because some parts are really too small to hold in your hands, you definitely need a pair of tweezers, but in the end...............i just love it!!
The seat i've used was a left-over from a Zetor-building-kit i've built last year, made by a Czech supplier.
For those of you who would like to take a look ahead in the proces: take a look at my scale-modelling website:
https://modelbouwjan.jouwweb.nl/landbouwminiaturen-trekkers/landini-6550-veloxdrive-1-32
There's a whole lot more to see there, you know.....😉
To be continued..............
Best regards,
Jan
-
9
-
-
Hi all,
As i've worked on dairy farms in my puberty an adolesence-time, i recall fine memories from working on a local farm using a Landini 6550 VeloxDrive.
So, collecting scalemodels with which i have a certain affinity, there should simply be a model of that type Landini.
But as you all probably know, there aren't that much scalemodels of Landini tractors.
So that kind of leaves the only possibilty to try to make one yourselfs. For that reason i purchased a model made by ROS, a Massey Ferguson 1014, since these models look quite the same, in real life as on scale. That purchase may be some 15 years ago, but it always was there, in the back of my mind, that the day would arrive to start re-shaping it to the Landini 6550. In the mean time i'm about four weeks busy now, and the result is coming to what i want it to be.
Time for some pictures now:
First of all some pictures of the original model from ROS, the MF1014:


Seems ther even was a collectors-set with a tracked-version, as shown above.
Now, dis-assembling wasn't that hard to do, but there was still a lot to re-shape, so saw and hand-file were needed a lot. For instance i assembled and mounted a drawbar and hitch (European version) to make the model look more realistic, and no longer a toy.
This is a picture i made from the frontpage of an original leaflet, which i collected bakc then, which shows the 1:1-version, almost like the one i've worked with:

Next thing to do is to put the die-cast body and parts into the paint-remover. Back when i've worked in a trading company which imported and recovered tractors, i got to know the difference between the paint remover sold at lumberyards, and the professional version a simple consumer cannot get anywhere. Well, that made a hell of a lot difference.
So, starting to work on the Landini-project, i dsicovered my stock was down to zero, and i had to visit a local car damage repair company, and ask them to sell me some new paint remover of professional quality. Simply because that does do the trick in minutes!
Here's the result:


-
5
-
-
Hi all,
Seems Replicagri will bring a CaseIH 845 XLA "Plus" version this year, due to news from Toys Farm Farm Toys:
Definitely one for my collection!!!
BR
Jan


-
5
-
-
On 1/19/2022 at 10:36 PM, SPN said:
Some recent additions to the collection.
The new ROS T7.270 Golden Jubilee, two 5 furrow conventional Kverneland ploughs and a pair of UH Dextas.


Hi,
Can i jsut ask: who's make are these Kverneland ploughs?
Look very nice!!BR
Jan -
Sean, just a question: what wheels have you been using now on the back?
From which model do they come originally?Looks great!!
BR
Jn -
5 minuten geleden, Pete132 zei:
A few plain colour containers would have been better than Claas livery
Hi,
Well, i guess a spray-container in your desired color can solve that problem. Doesn't it? 😉
-
20ft container, 1/32, made by MarGe models:

And there's another one also, supplied by a German supplier:

-
Hi,
Well, regarding printing White, that indeed is only possible with the unaffordable printer Joe says. So i had to find another possibility.
Since there are two sorts of waterslide-decalsheets, namely Transparent or White-based, i choose the White-based version for whenever i need someting which has the white color in it. For example: i'm making the building-kit of the Caterpillar D8, bought me years ago a half-built copy secondhand, and there where no decals with it anymore. No problem, i can make them myself!As mentioned in another topic, also started by Joe, i recommend the programm "InkScape", which i use for something over a year now after my computer crashed and i lost my Illustrator-app. Whenever you need to have white fonts on a colored background, as Joe's example here above, i make the colored background first and then put the needed text in it, making the textcolor white! That way you can easily place the text where you want it.
I'll show you the picture of the Cat-logo i've made in InkScape below:
As you can see it is printed on White waterdecalsheet, leaving it to dry white after assembling.
Right underneath the logo you'll see a small piece which i've cut out, that's where the type-numbering will be, but this is meant to be having the yellow background.
So that number "D8H" i will print separate on a piece of Transparent decalsheet, and place it afterwards in the niche.
The "old" CAT-logo i've designed using the drawing function, drawing a black square, a white circle and two black stripes. Just place them as you like to get the logo as it needs to be.Any questions, don't hesitate!
Best regards,
Jan
-
1
-
-
Hi there,
I've been making my own decals for about some 20 years now. Originally using Adobe Illustrator, but after a computer-crash i've lost my copy.
So i had to look for something else which apparently became the app "InkScape". Probably not to mention i'm using an iMac, since the Mac's simply give better results in these fields of work, according to everybody who works with it.
The problem you might have with these fonts Joe (Catkom3), is that they seem to be like a ".jpeg"-file. The biggest disadvantage of that, is that these files are built-up from small pixels, which results in a worse visibility when you decrease them. Increasing them leads to un-sharpness also. I took a small example from the decals on your Claas combine, and there it shows quite good: The "CLAAS" word is very sharp (yes i know, it's original!), but the "Hay Farms" and the street name (if that's what it is) are un-sharp.

What you need to have is a program which works with so-called "vector-files". Meaning that the files e.g. fonts and pictures always stay sharp, whether you increase or decrease them. It has no effect on the sharpness and visibility.
I can recommend InkScape to you. I'm using this now for over a year, and i'm very happy with the results, although Illustrator remains my favorit! Another large advantage of InkScape is that it's freeware! So you can download it for free!! Here's the link: https://inkscape.org/nl/download/
Another thing which is of direct influence, is how your printer is set for printing: i always use a high resolution for printing on decalsheets, just in order to get the best results. Choosing another version of paper might be also affecting the result. To go short: trial and error is my method and i ALWAYS make some examples on normal white paper before printing on decalsheets.
Good luck!!
Best regards,
Jan
-
1
-
-
- Popular Post
- Popular Post
Hi all,
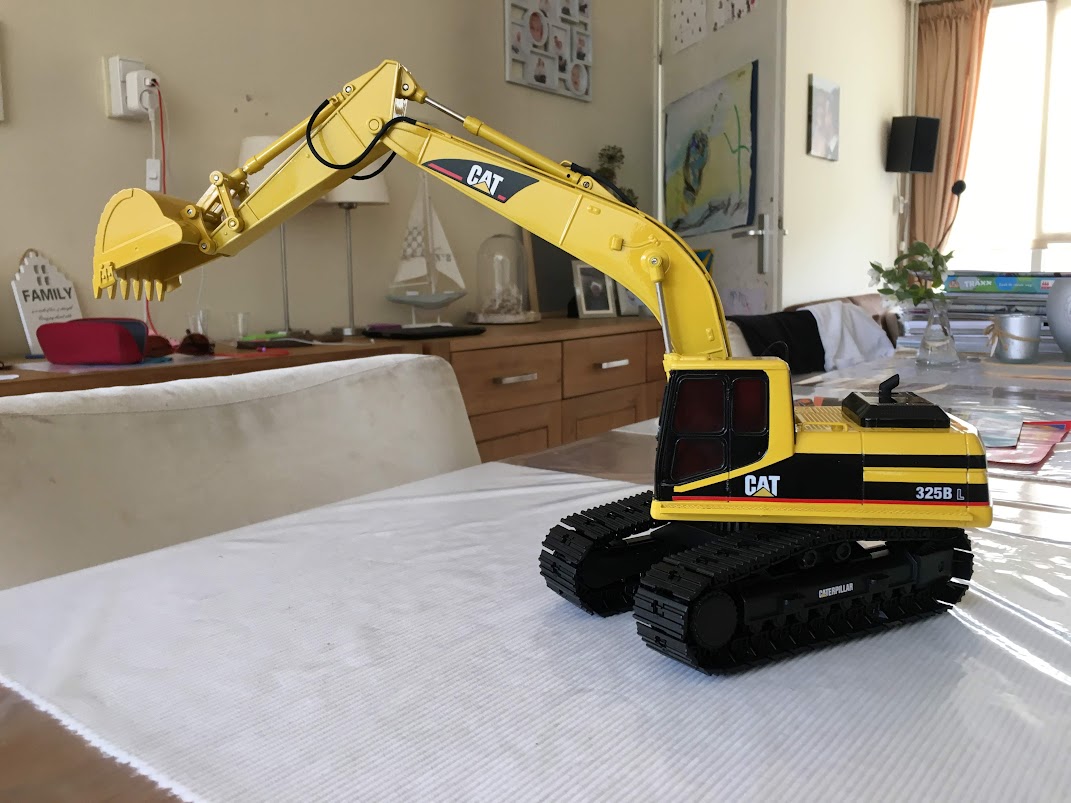
Well, i don't know whether it's allowed (still i think it is!), but on my workbench at the moment is a bulldozer, the Caterpillar D8H, scaled down to 1:25. There was this building kit in the '60's, but since a few years it re-appeared again, now being called "Construction Dozer", without the original Caterpillar'-logo on the box.
In the years before it re-appeared i was lucky to be able to take-over a half-built copy from an older man, who wasn't able to finish it because of an illness. His daughter, who came at the door, told me they really would like to sell the half-built-model to a real enthousiast. Well, they succeeded in that!!
On the Dutch model-builders-forum you might want to take a look at the building-process i'm going through, this is the link:https://modelbrouwers.nl/phpBB3/viewtopic.php?f=32&t=54085
Allthough the text is written in Dutch, the pictures may also be telling the story.
When you prefer to only look at pictures, without a lot of text, than take a look at my own website:
https://modelbouwjan.jouwweb.nl/grondverzetmachines/caterpillar-d8h-bulldozer
My ultimate goal is to eventually build me two dozers: one being the D8H, for which i've also build a cabine, and the next project will be built out of the box of a new one, but being upgraded to the D8K-version.
When everything finally comes together as planned in my head, it will be amazing. But, the judgement is also up to you!
Just one picture of the state of the project so far:

Best regards,
Jan
-
10
-
I also agree guys. Since becoming a LCN-member, back in 1990 or so, i haven't missed one single fair. I remember in the early days it was held in Dronten, but when that occasion became too small for the amount of visitors, they choose Zwolle, which is a great building for such fairs.
Rumors however are going round now for several years that even Zwolle will disappear, seems the owner of the building has plans for renovation or even re-building from the ground.
We'll see what happens, hopefully this virus-misery is going away quickly!
Best regards,
Jan
-
2
-
-
On 5/18/2021 at 10:14 PM, Goodiestractor said:
Hi Jan welcome to the Forum have or do you attend the LCN show at Zwolle as several Collectors on here do make the trip as and when the show is on
I hear no announcement about this years show has been made but something is going to be said in June apparently is it possible you could find this out and confirm something to us.
Thank you for sharing some of your collection they all look very nice and well cared for
Kind regards
Goody
Hi,
Thanks for your reactions to my post.
Unfortunately there will be no LCN-show at Zwolle this year also, due to Covid-restrictions.
As (one of the first) LCN-member(s) i also regret this, but the organisation has decided so a while ago.
You have to understand it takes several months of preparation to organise a fair like this, and they do not see any chance to do so.
When there will be any change, i surely will let you know, but personally i do not think it will be held this year.
We'll see what comes next year.
All the best to you!
BR
Jan-
2
-
1
-
-
3 hours ago, robbo said:
Limited edition set from Poppema Agricultural Miniatures
Massey Ferguson 675 4WD and Massey Ferguson 690 2WD.
I don't wish to be critical but I would have thought that it would have been better for the 675 to be the 2 wheel drive version and the 690 to be the 4 wheeler, having said that, I will probably order the set
Hi all,
Visited this supplier, my "regular one", yesterday, and immediately ordered this set.
I know this guy quite some years now, and what he brings out, is mostly perfect!!!
Best regards,
Jan
-
Hi all,
Got myself these two today from my regular supplier:

Britains CaseIH 4894, and ROS/ToysFarm Fiat Winner140.
Best regards,
Jan
-
9
-
-
32 minutes ago, mb86 said:
Welcome to the forum Jan. You have a fantastic collection. We all collect for different reasons but it is always that bit more special when it has a personal meaning.
Thank you all, Martin here in particular.
Indeed, one can collect everything which is (or: was) available, but you'll definitely need a second house or shed for these amounts.
I personally am very happy with the newest members of the suppliers, like Universal Hobbies, Wiking, Replicagri and Weise, for instance.
When i was a kid, there was only Britains, and i was happy that Siku entered the ring with agricultural models in 1:32 scale.
I remember my first Siku model: it was a Fendt 308LSA, having a white-plastic cabin, and it was painted in Deutz-green.............😱
Nowadays one feels ashamed to have such a "toy" in your collection.
So, through the years, as getting older, and for that possibly somewhat more sentimental, you'll see your collection growing in a more specific way, which i think is common and healthy. ☺️
Best regards,
Jan
-
3
-
-
Aah, now i see!! Thank you David!
But i don't remember seeing one of these around here?
(i was just checking the WWW for pictures of old(er) Case-models of combines........ 😉
In the area i live, there seem to be a lot of very small combines still working, like the old Claas ones etc.
Somewhere i must have pictures made of them, but where to find these pictures.....??? 🤔
-
1
-
-
I'm sorry Ben, which one do you mean?
-
- Popular Post
- Popular Post
Hi all,
Well, just giving it a try to inroduce myself, i was born and raised on the edge of a small village, just near the countryside, so getting to love farm-machinery wasn't that big of a surprise.
After having done agricultural education, i started working as a junior mechanic in agricultural machinery and tractors (late 1980's).
Even made it to be mechanic at one of the top-three importers in these days in the Netherlands, but after about some eight-and-a-half years i thought it was enough.
So i switched to a different kind of branche, the rehab-equipment. Also working as a mechanic, now for about some 25 years.
Since almost 8 years now working as a Service Technician for a Swedish manufacturer of "high-end" electrical wheelchairs.
Collecting scalemodels, specifically of the brands i've worked with on farms as well as in my early career, has never gone away, and is quite some collection these days.
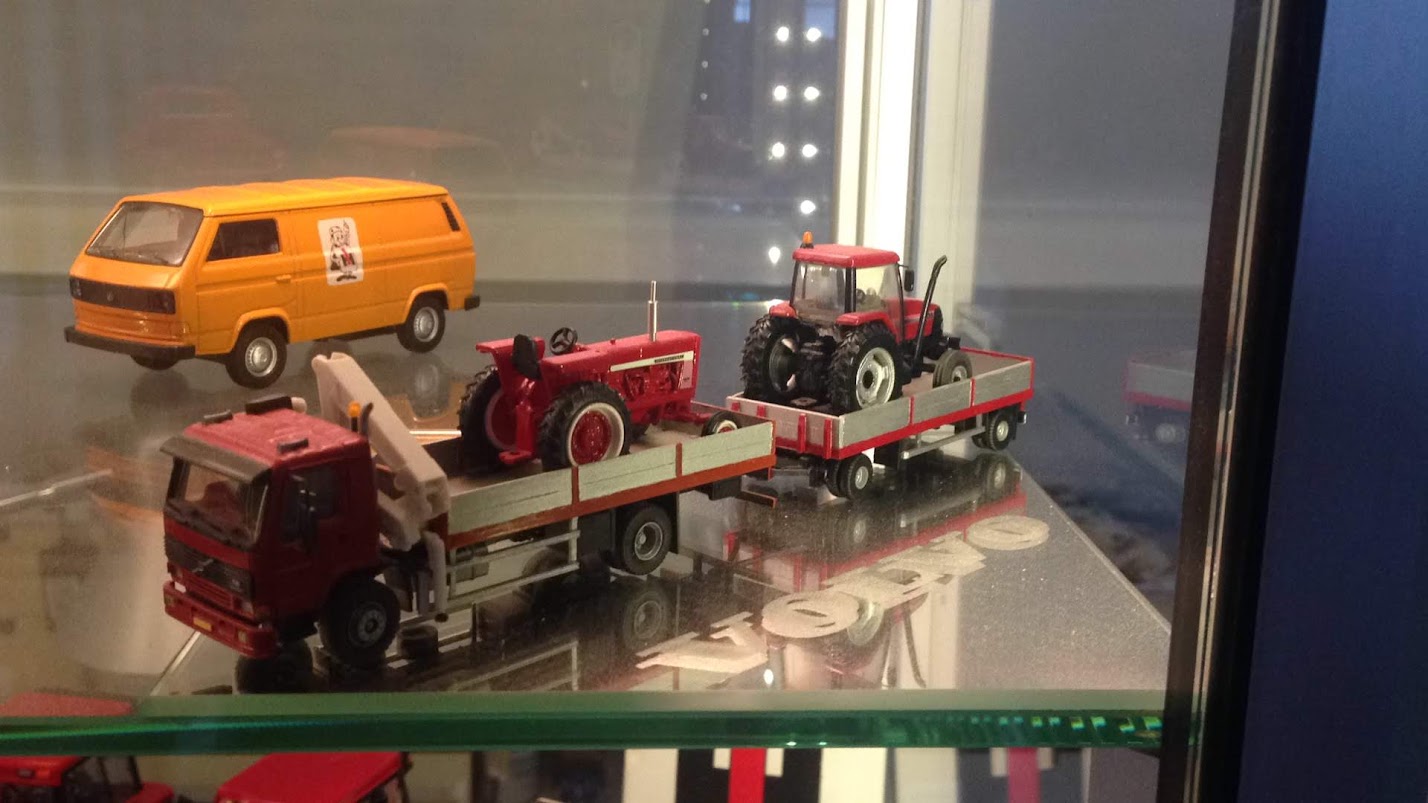
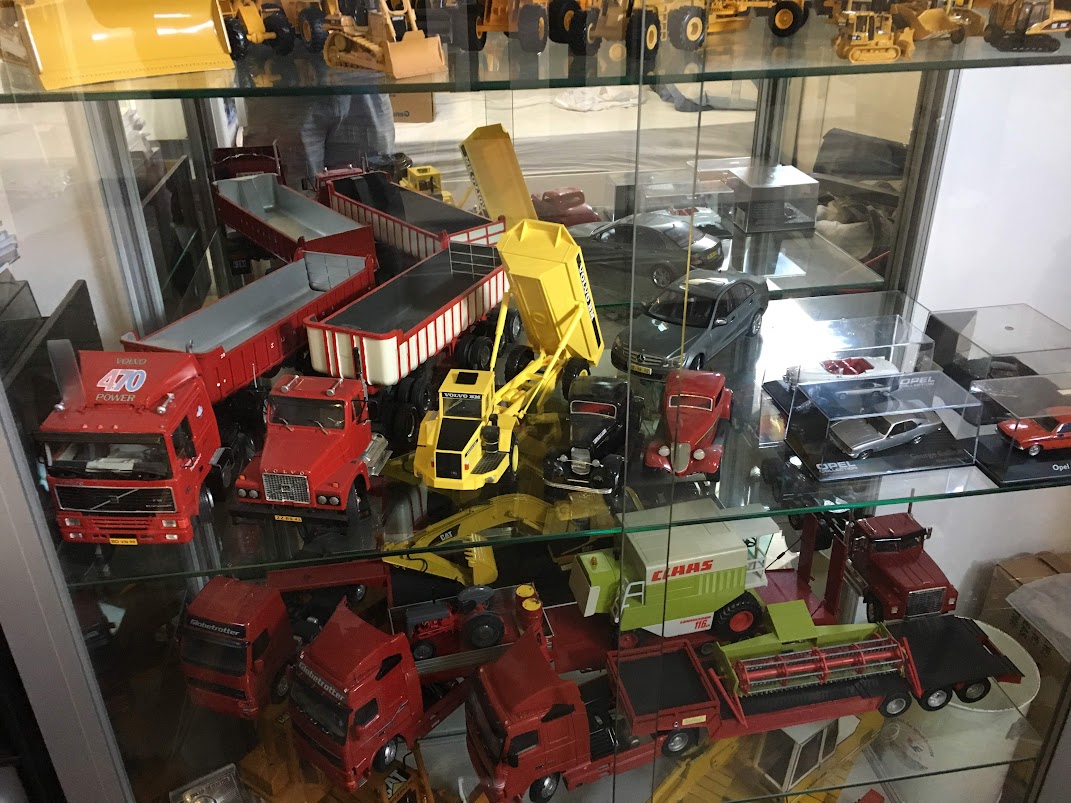
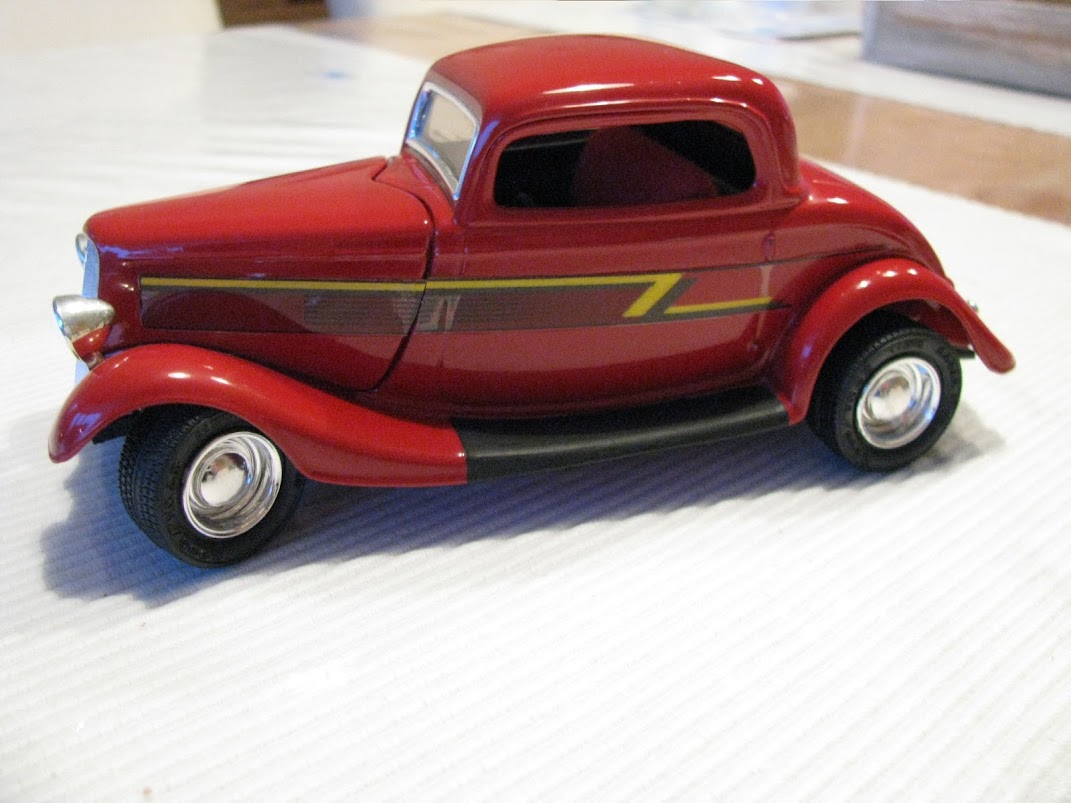
Other parts in my collection are earth-moving-equipment and heavy transport, as well as having a scalemodel of every car i've ever had, and of every service-van i've driven for my job.
I even make the original logo's and stickers in the right scale for that!
Since a few years i started airbrushing, specifically for scalemodelling, and this is giving quite satisfying results!!
I probably will not be a lot on the FT-Forum, but know that there are always many ways to contact, so don't hesitate!
Best regards,
Jan
Just a few pics of some scalemodelling-work:
-
12
-
1


Landini 6550 1/32, made out of a Massey Ferguson 1014 from ROS
in Latest Tractor Conversions & Scratch Builds
Posted · Edited by WHITESNAKE01
Hi all,
And finally, she's ready. Just one more tiny little thing to complete by mounting a windshield-wiper on the front windscreen, but first i have to find that in a nice fitting scale.
And maybe some front mudguards would be nice too.......
Here are the pictures of the result:
Found a better place to make pictures: my spray-booth (airbrush-booth): Múch better light!
Have a nice day!
Best regards,
Jan