


JCB BLOKE
-
Posts
333 -
Joined
-
Last visited
-
Days Won
2
Content Type
Profiles
Forums
Store
Events
Posts posted by JCB BLOKE
-
-
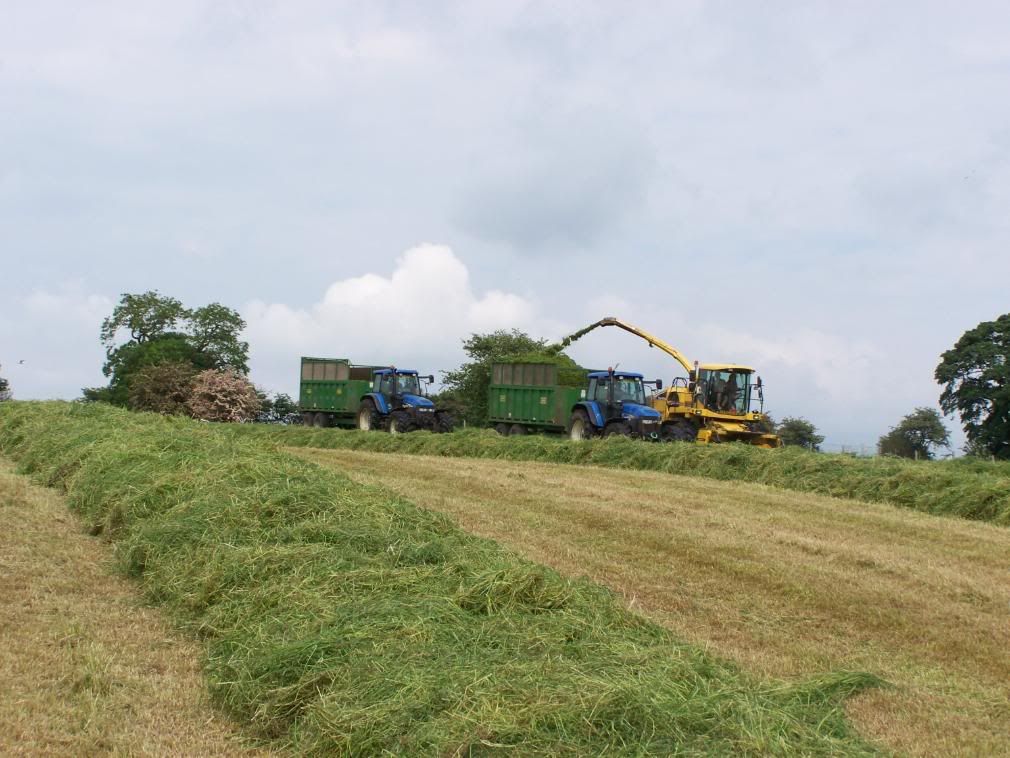
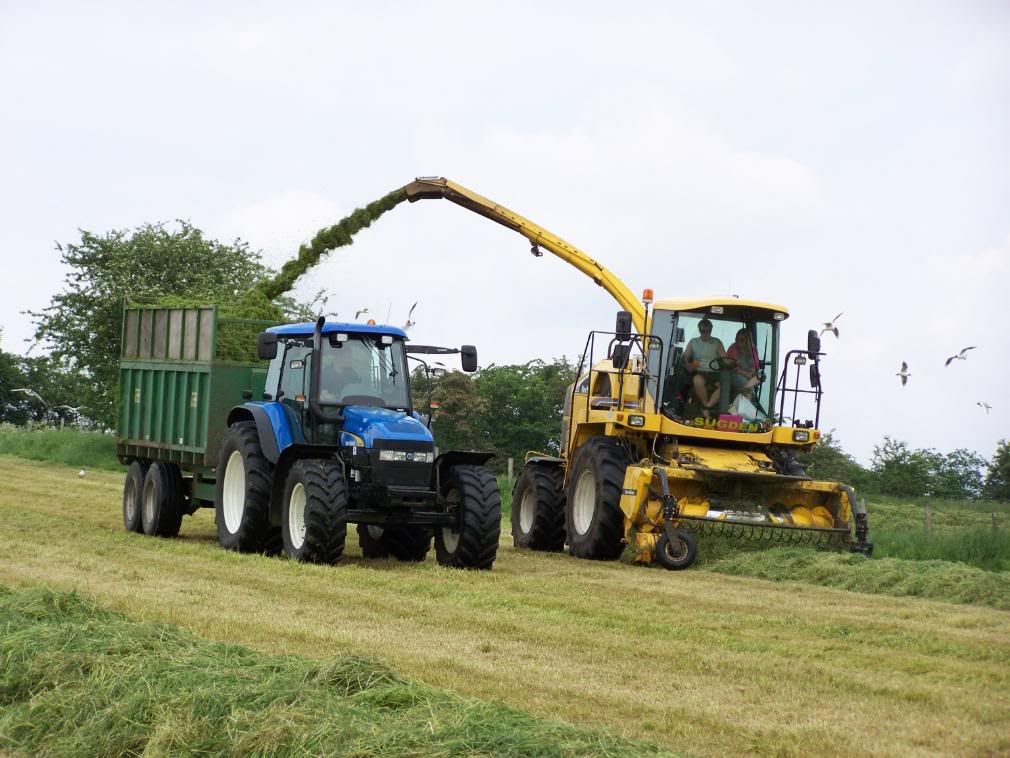
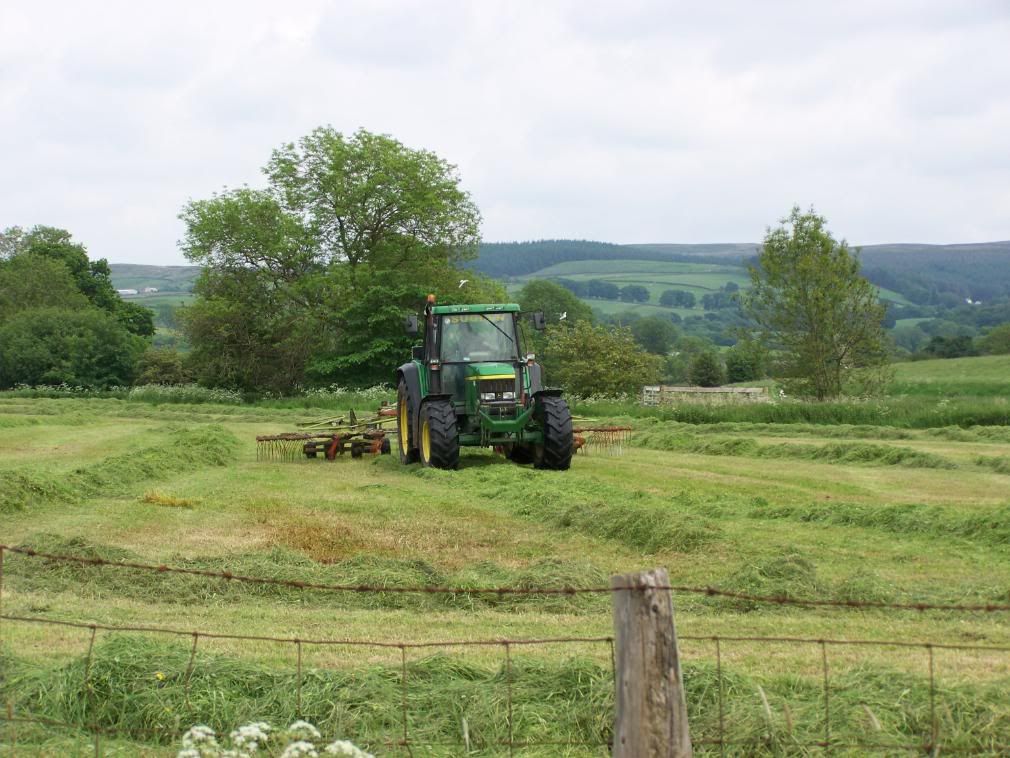
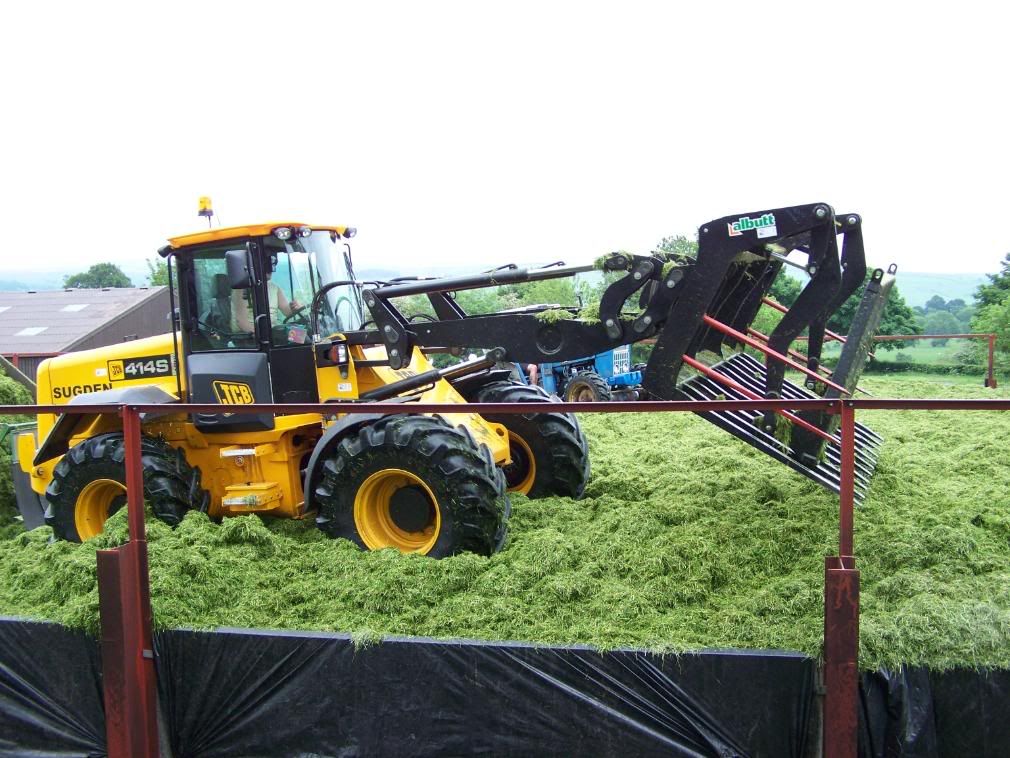
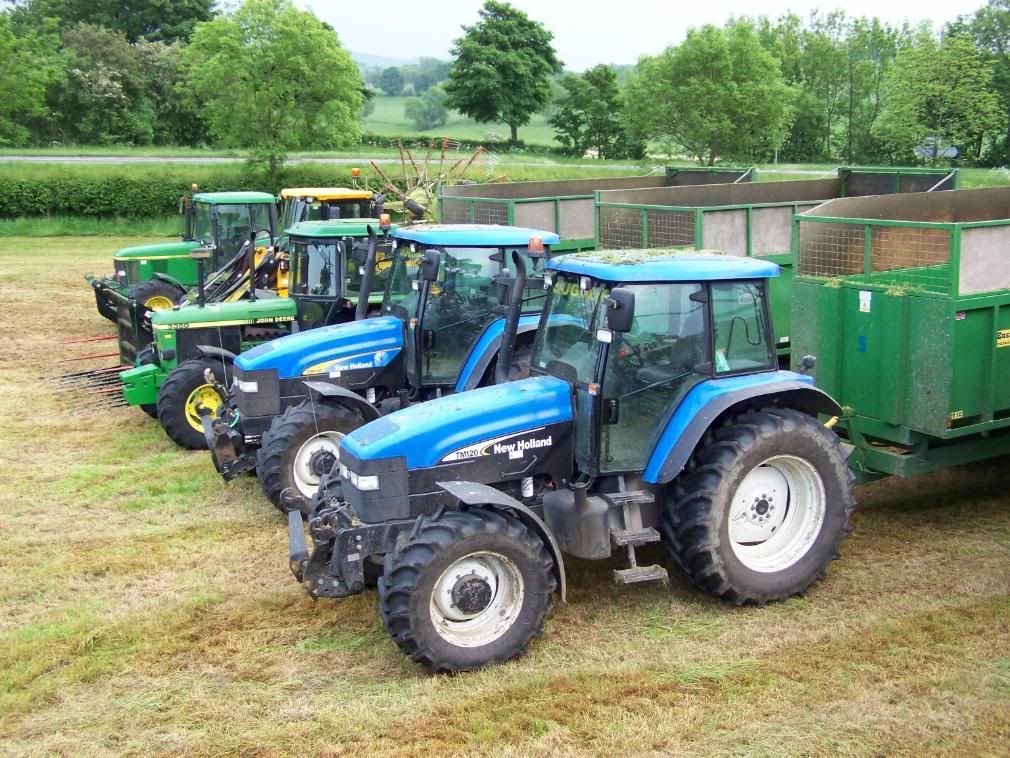
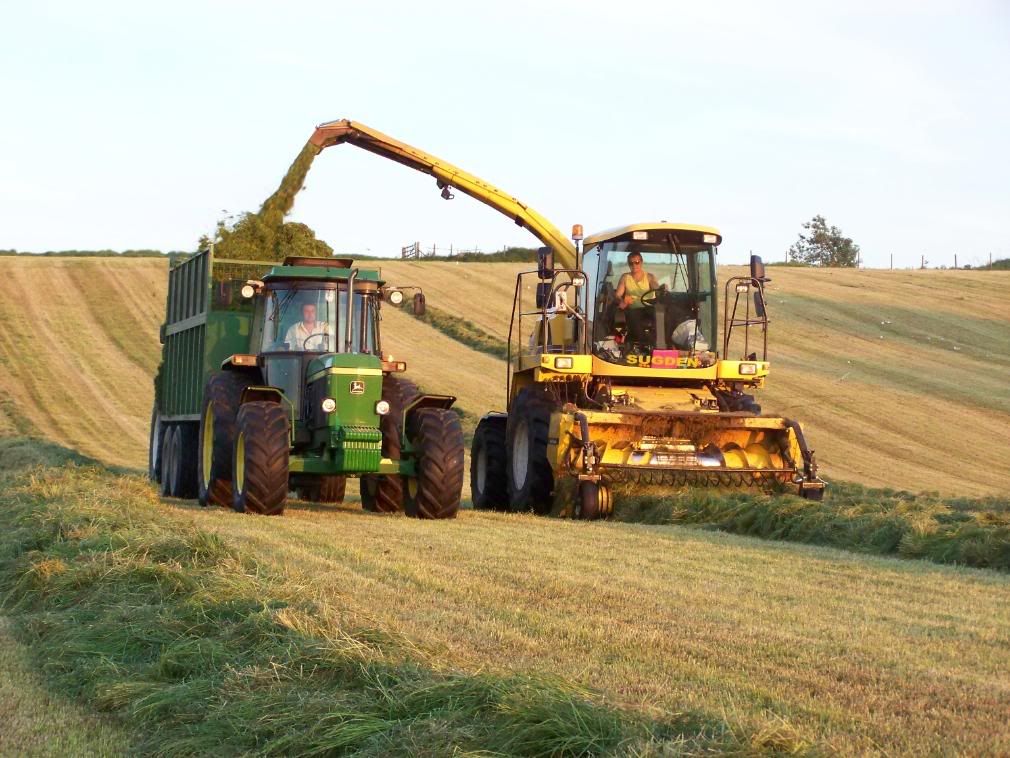
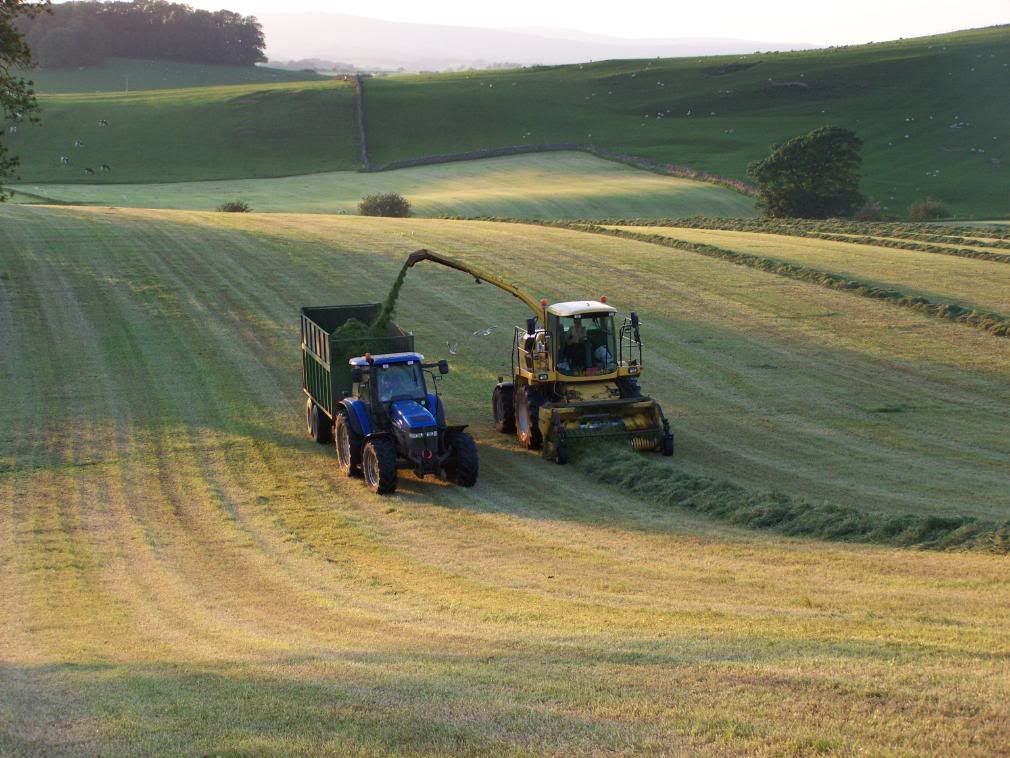
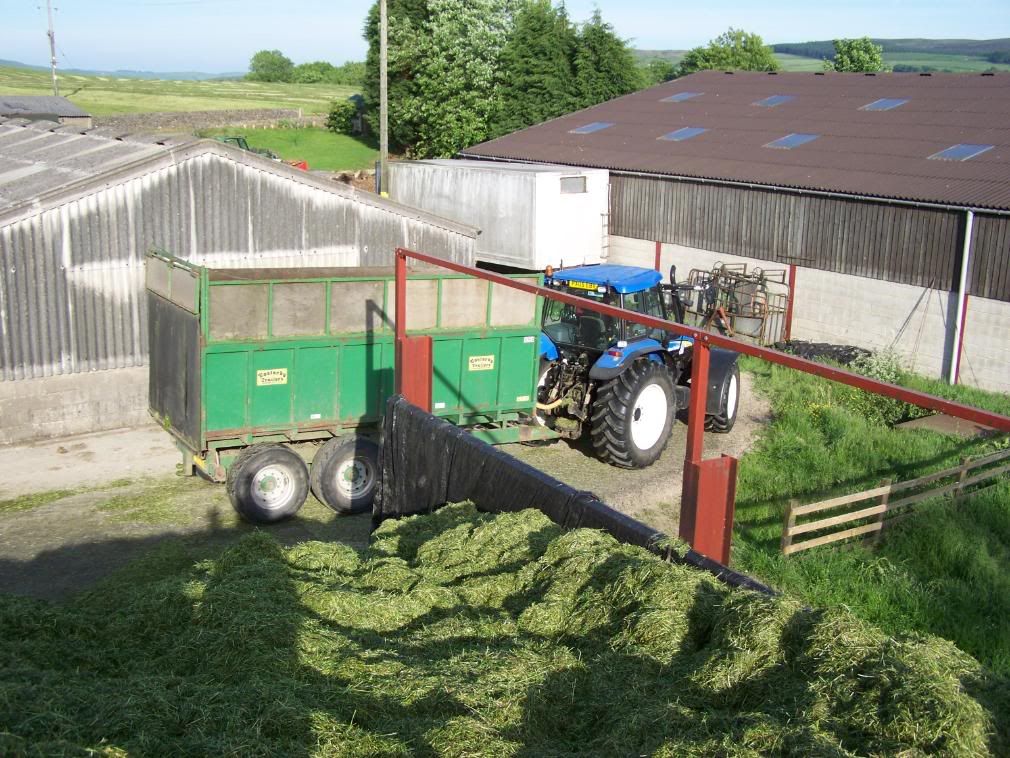
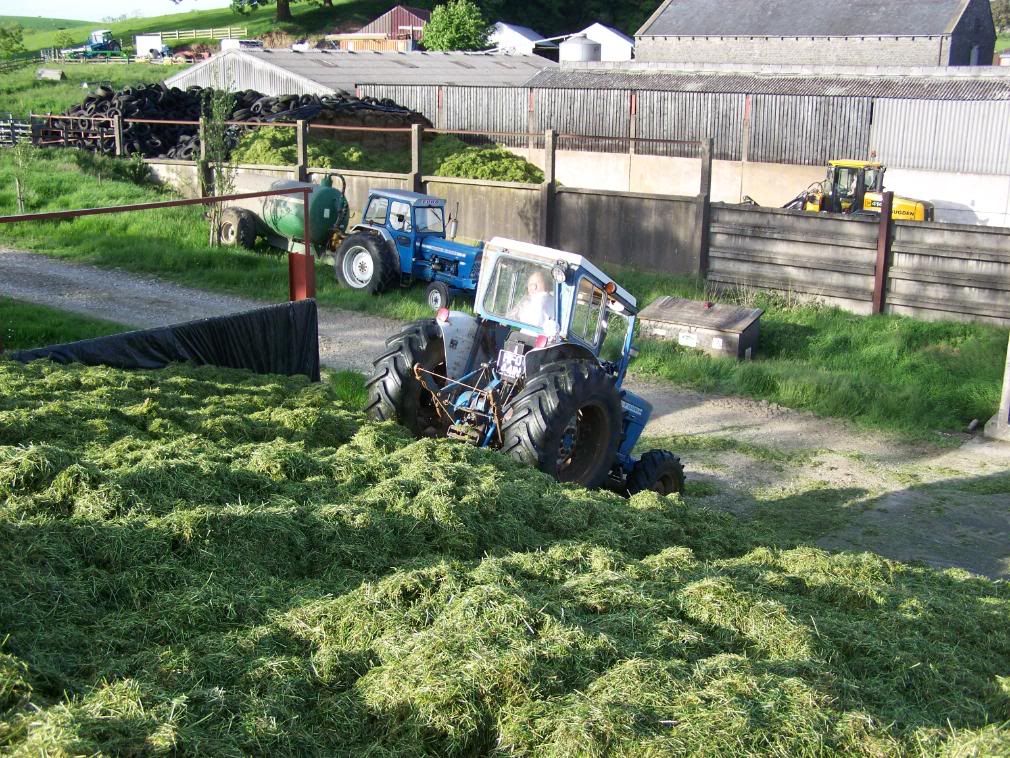
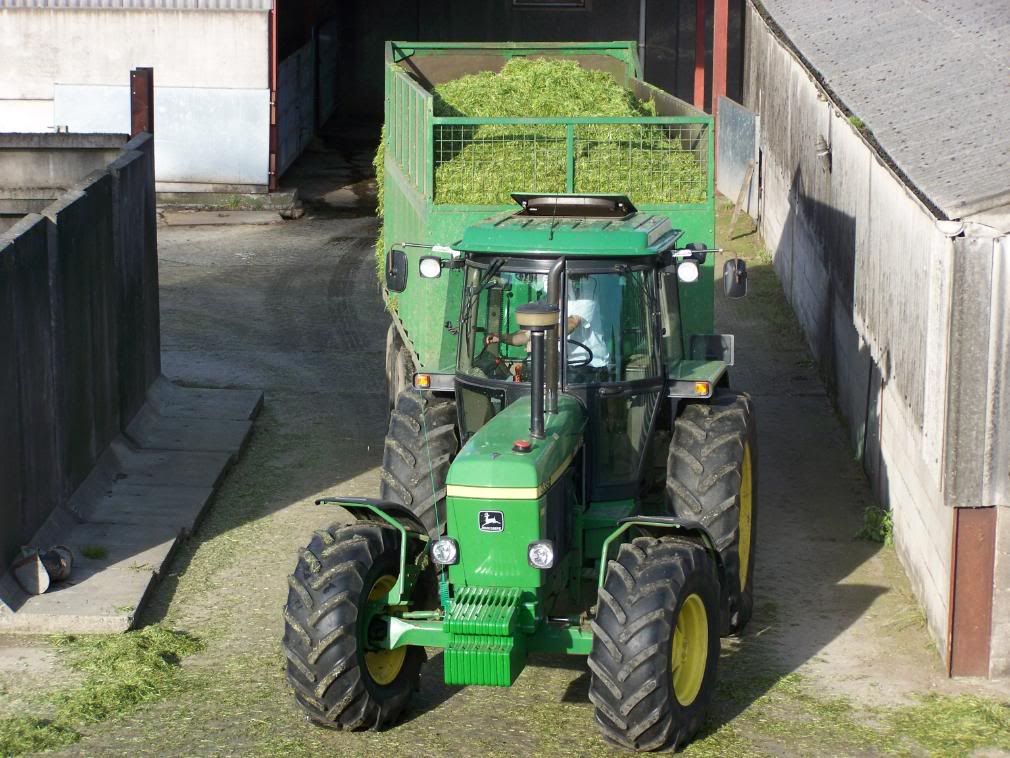
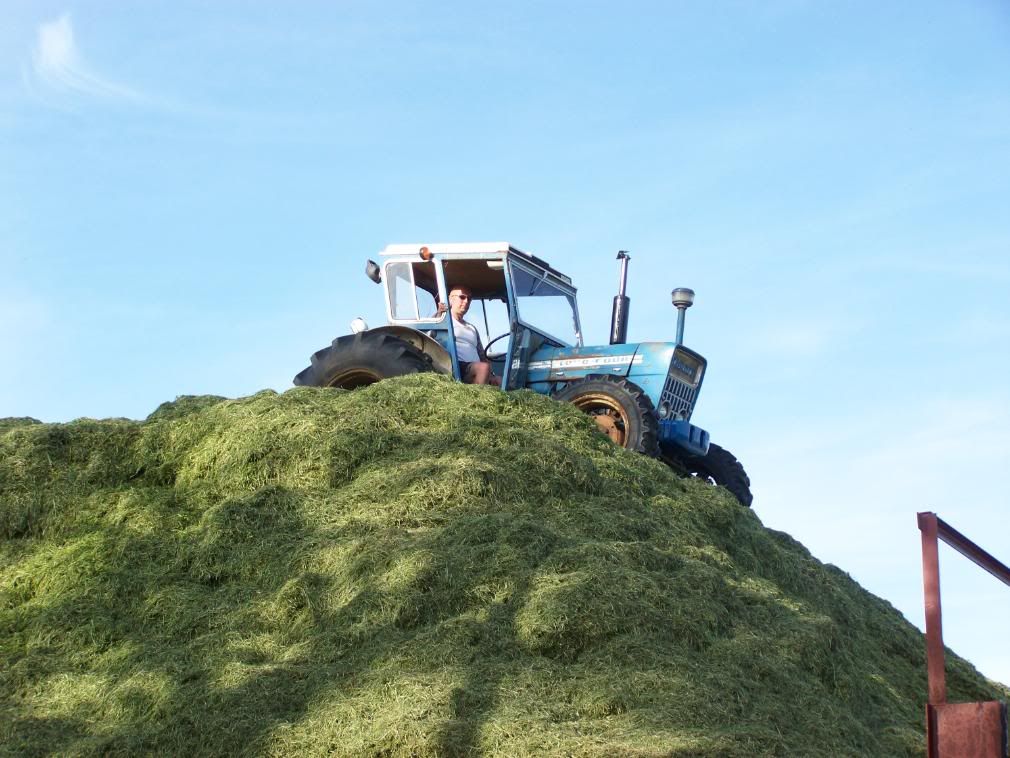
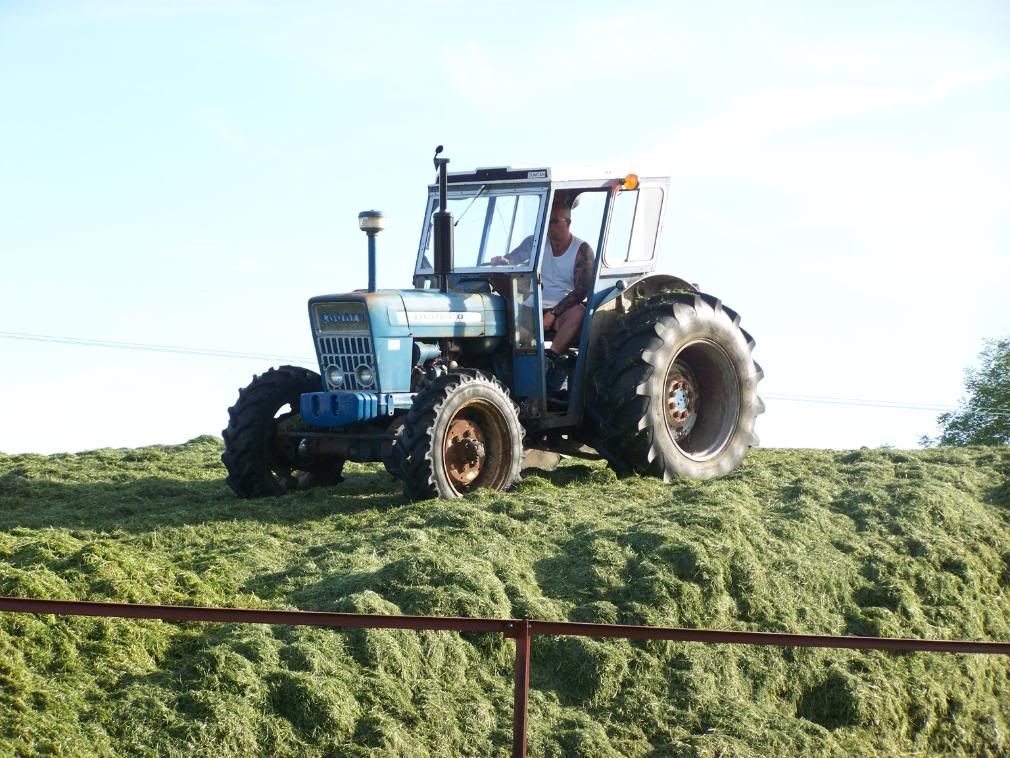
Spent the weekend getting the sileage in - about 400 acres worth - then last night sheeting and tyre -ing up the clamp. Just a few pics .....


-
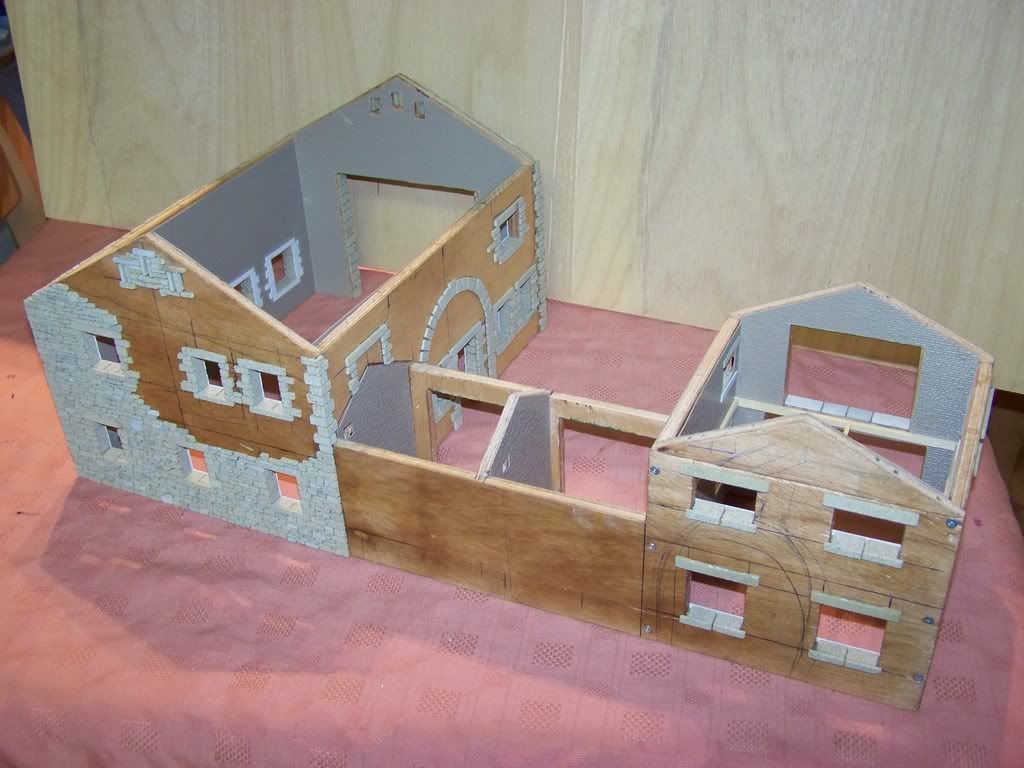
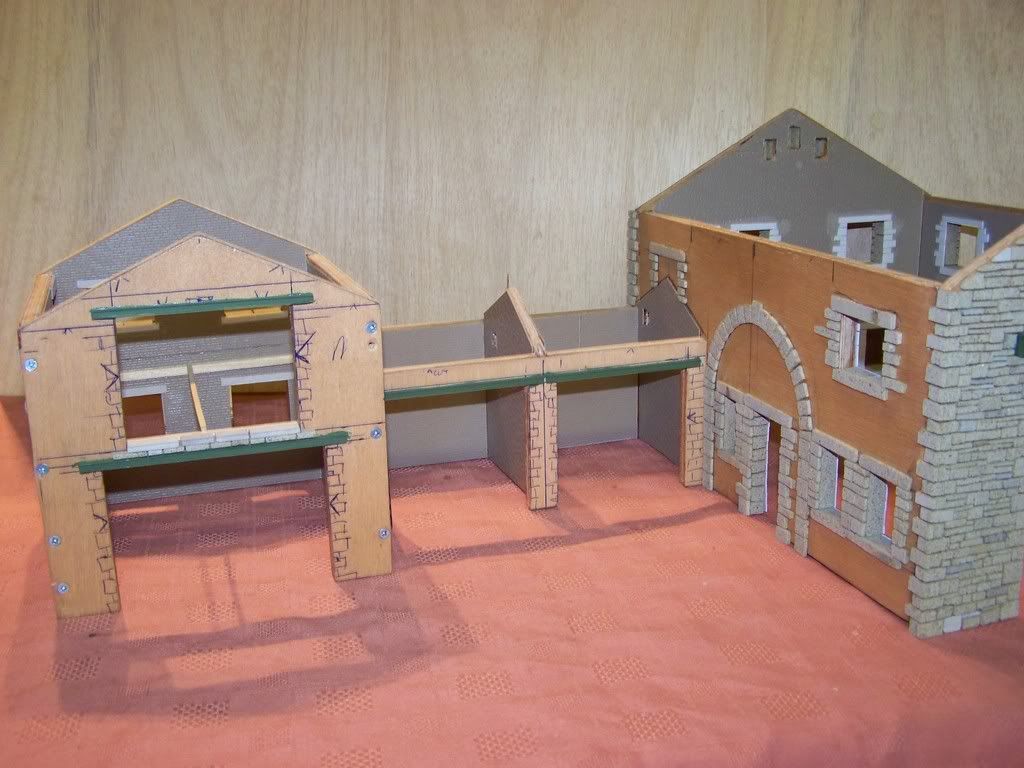
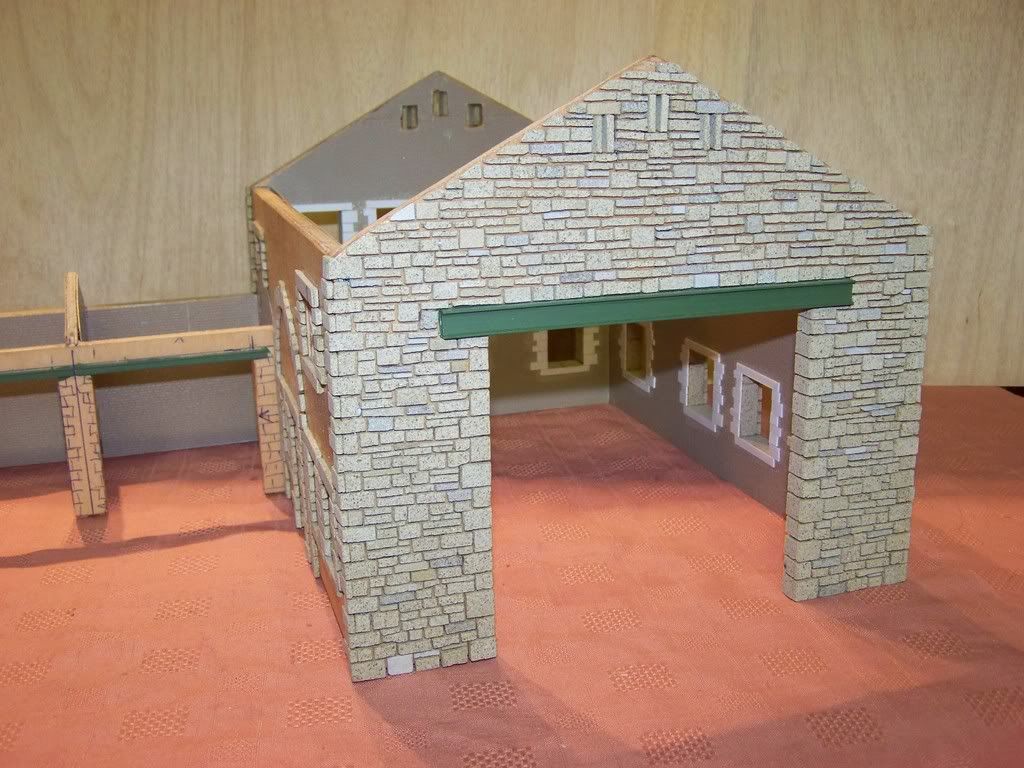
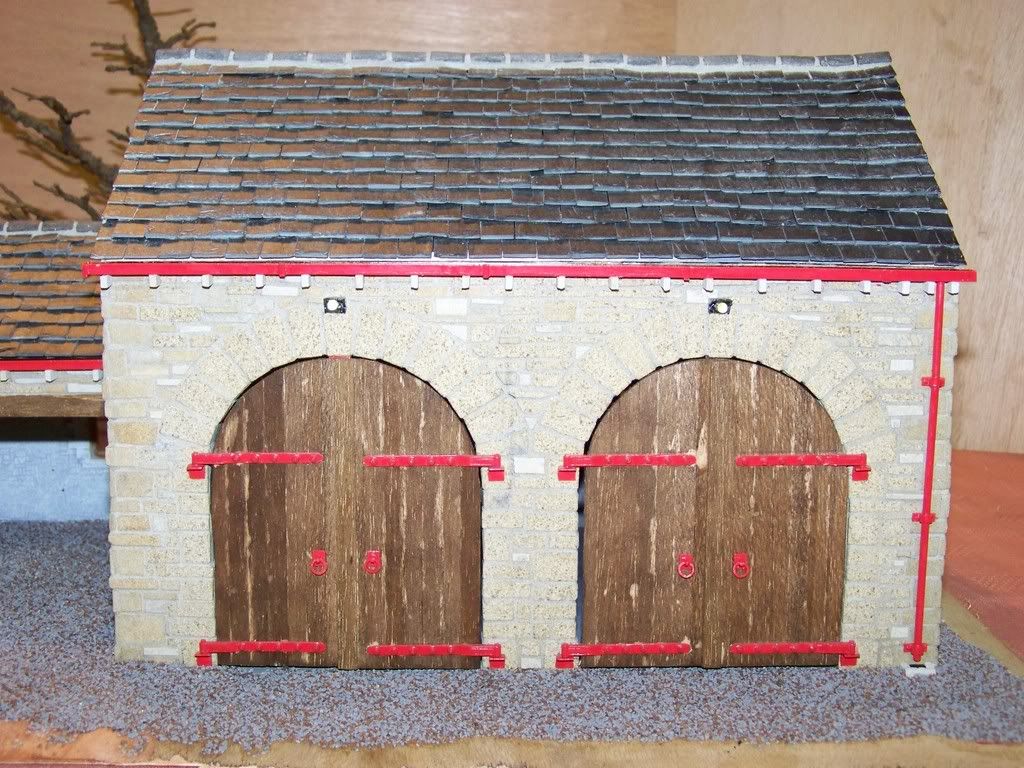
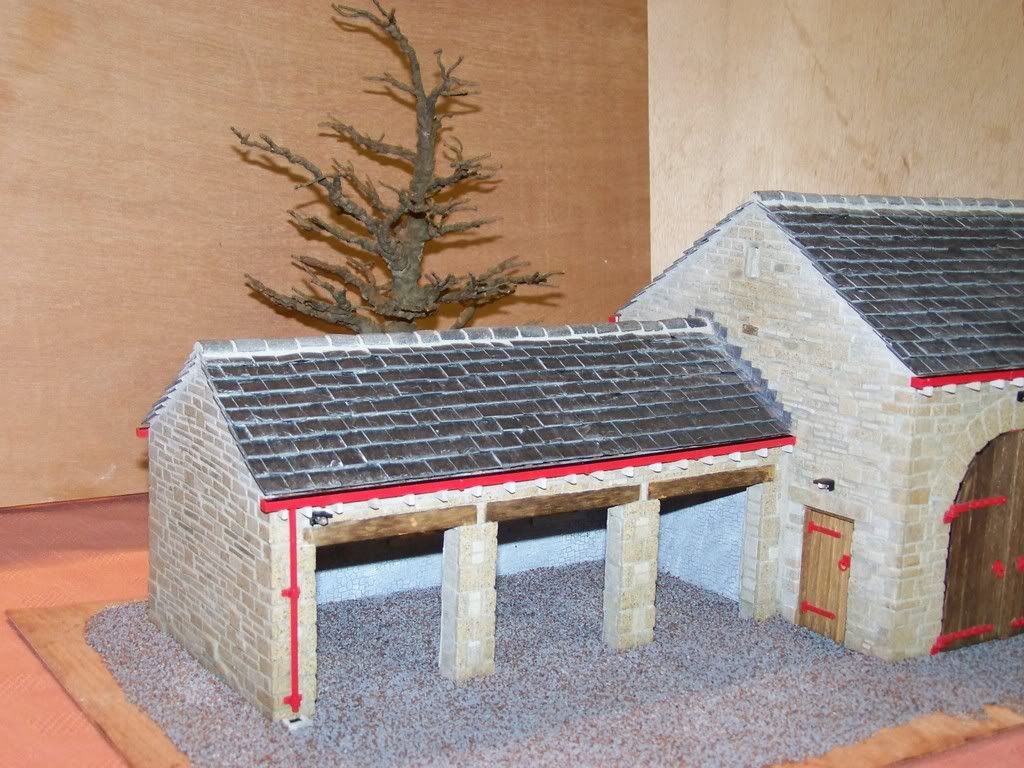
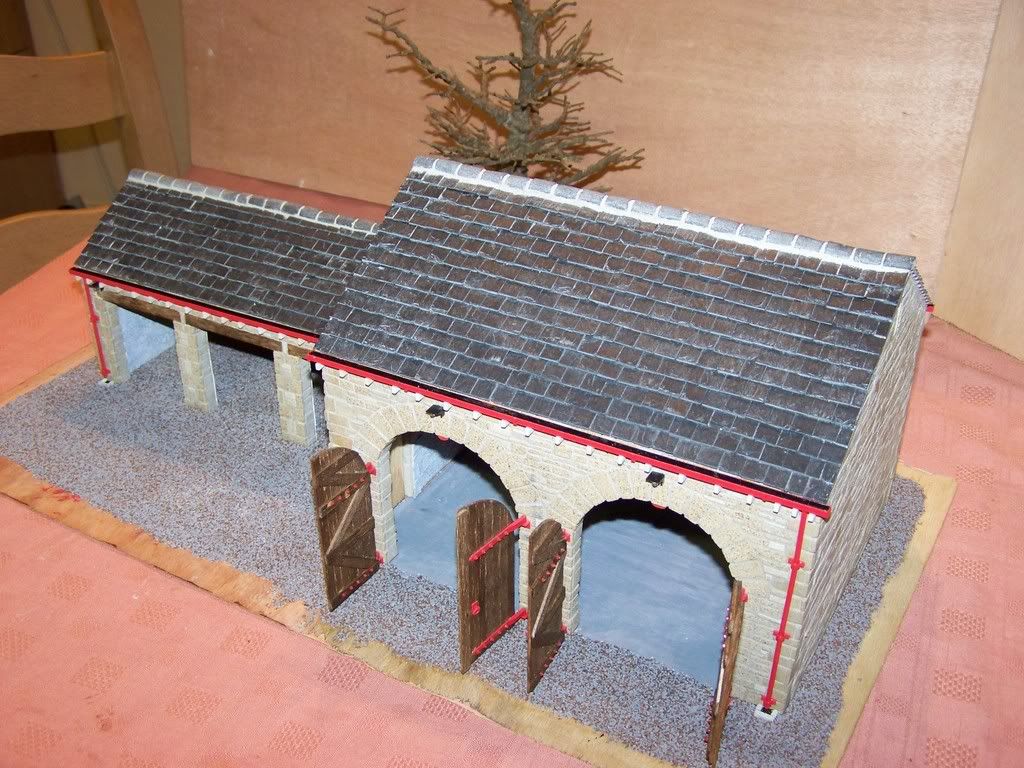
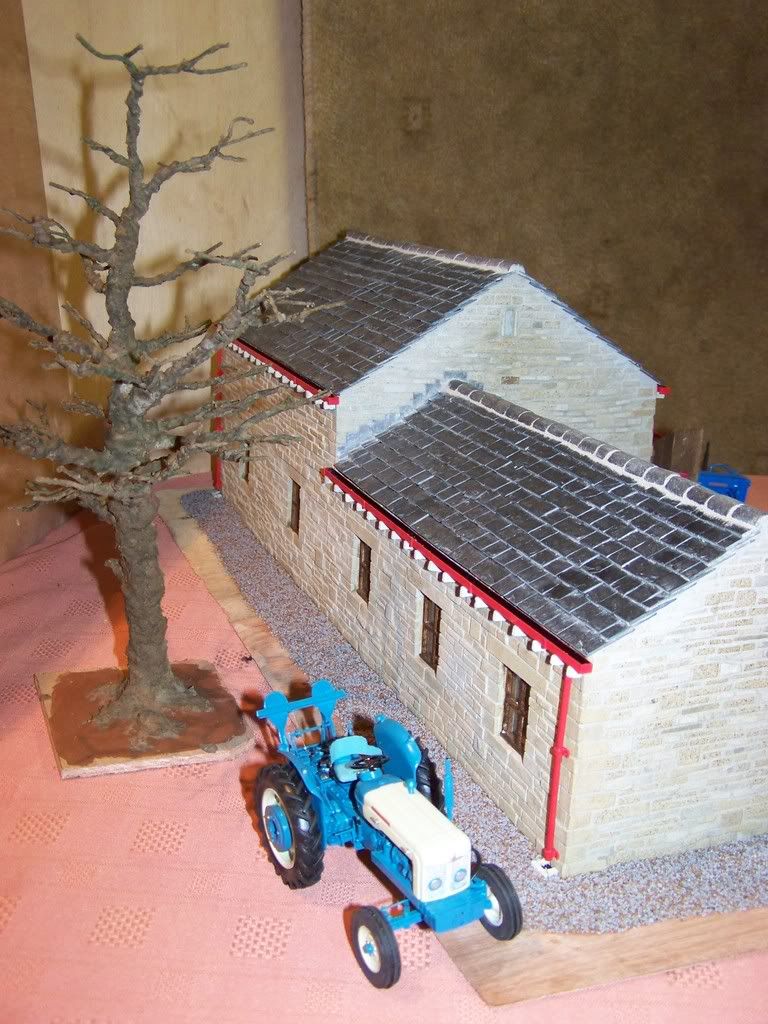
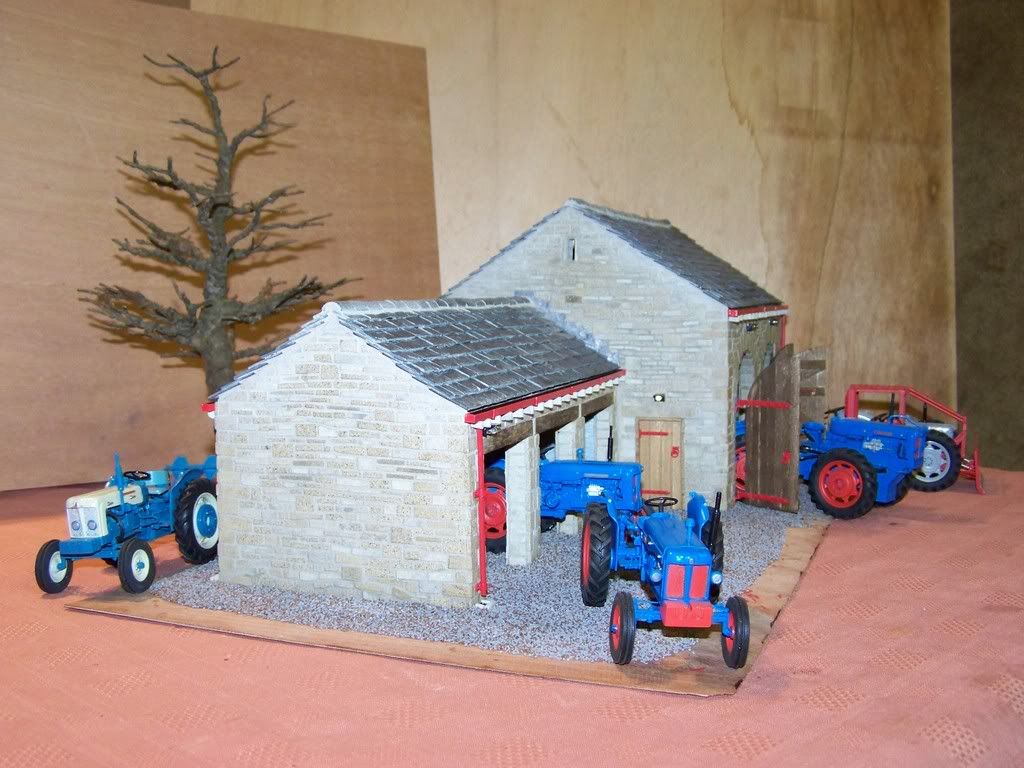
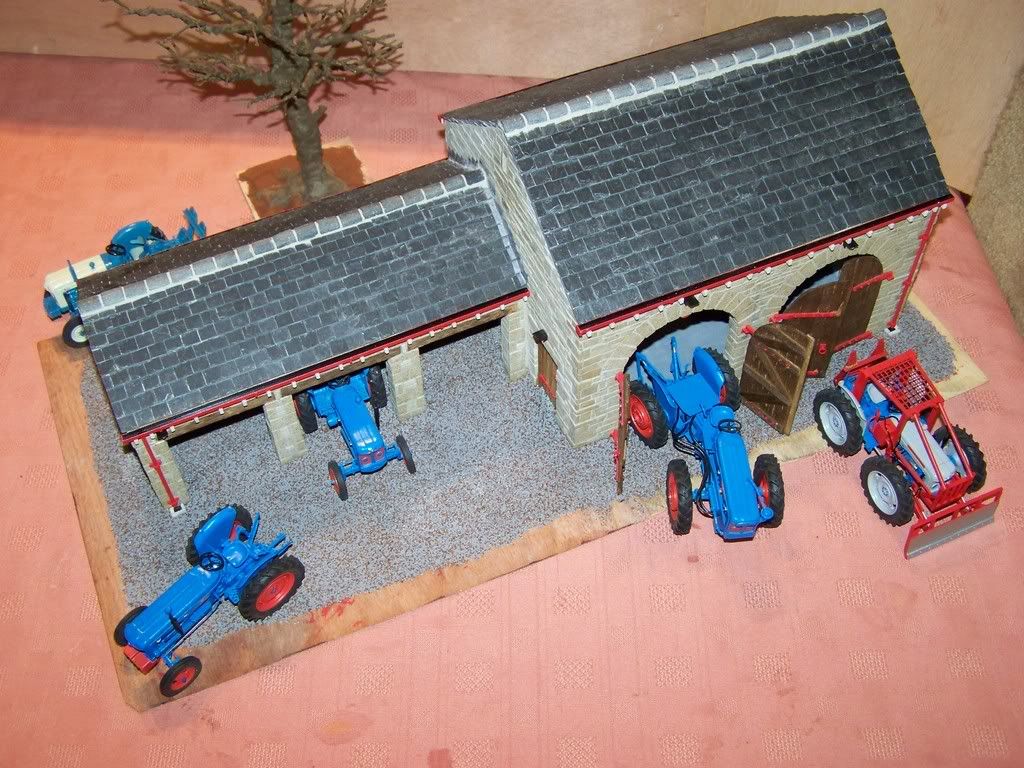
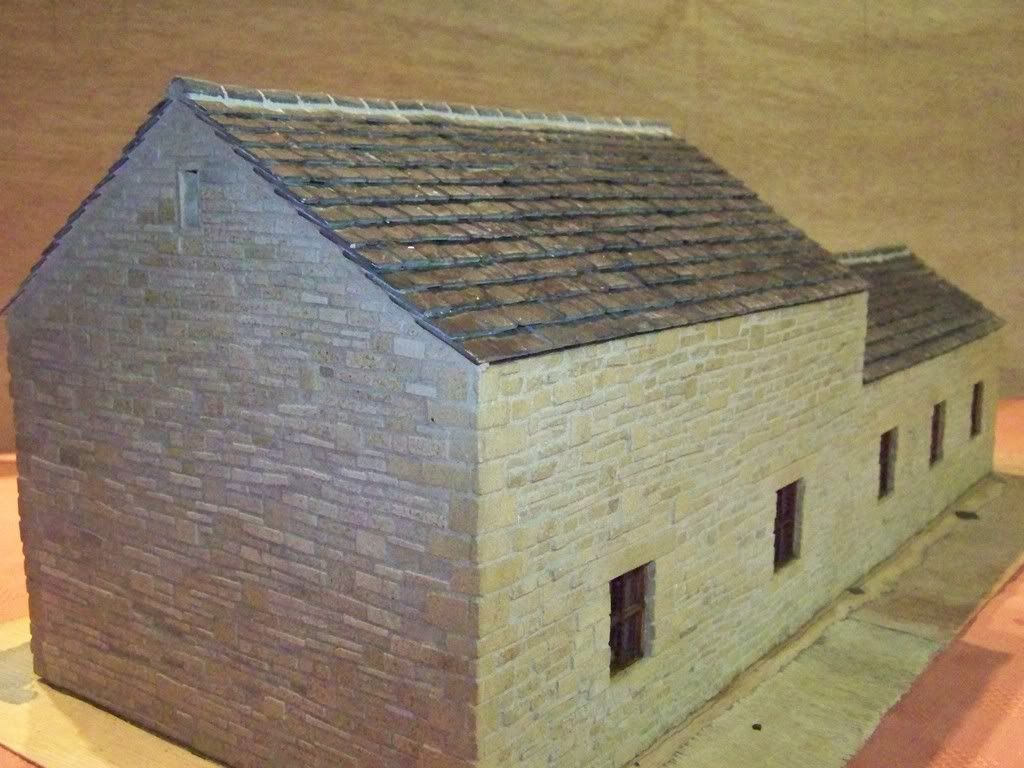
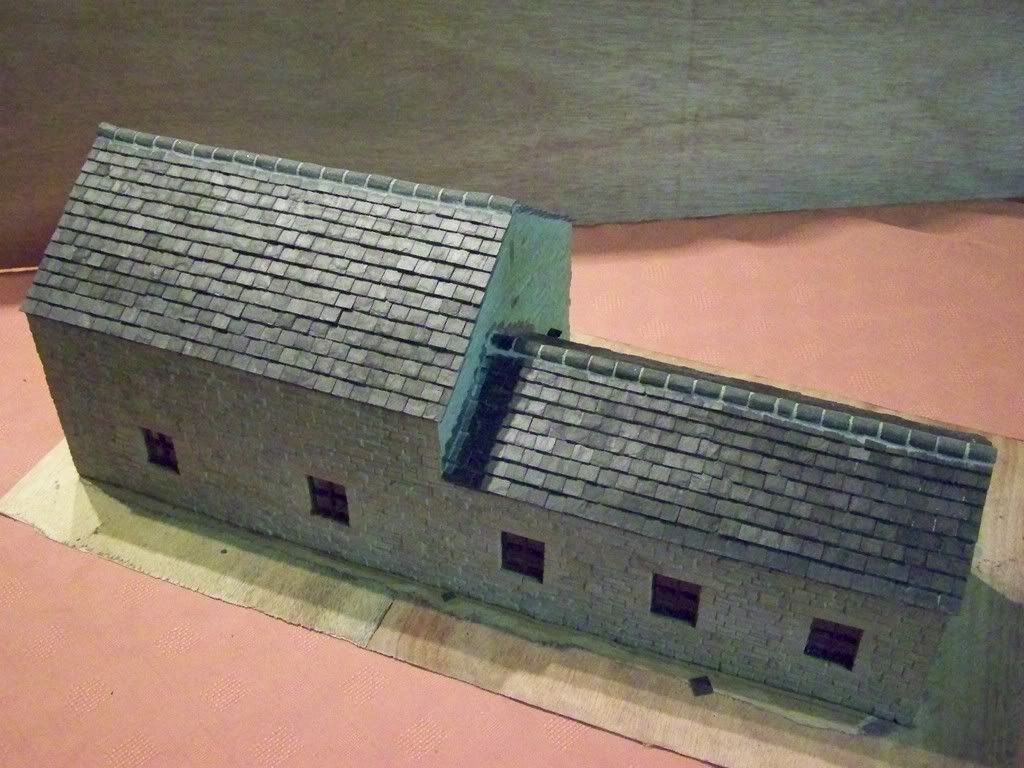
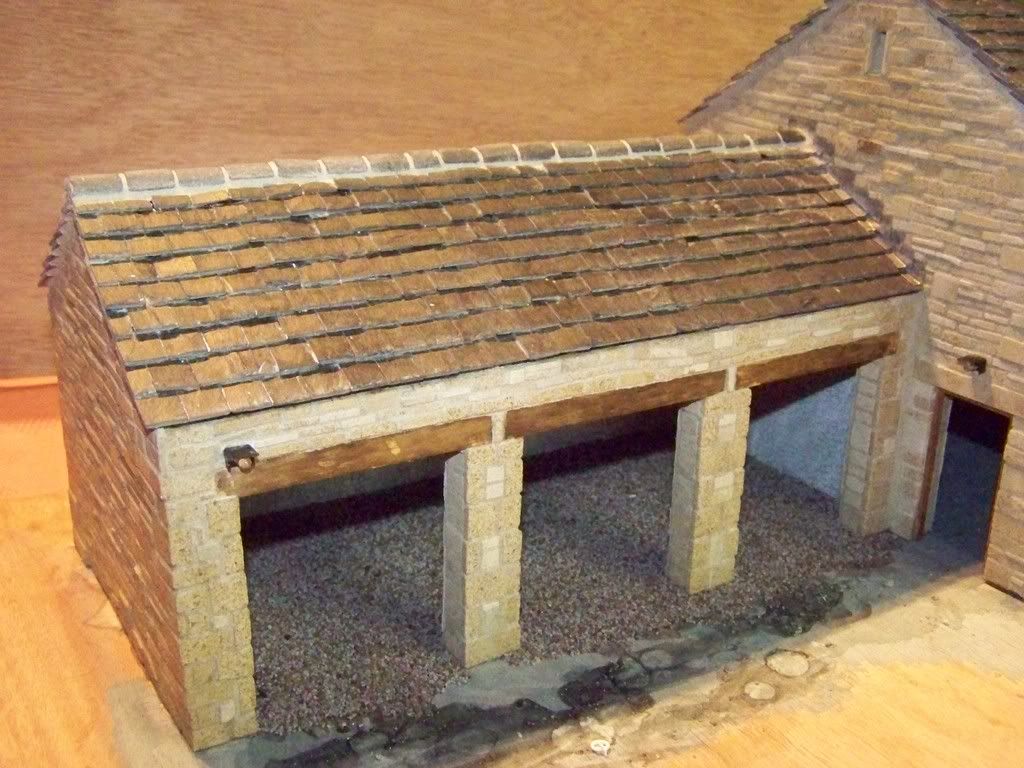
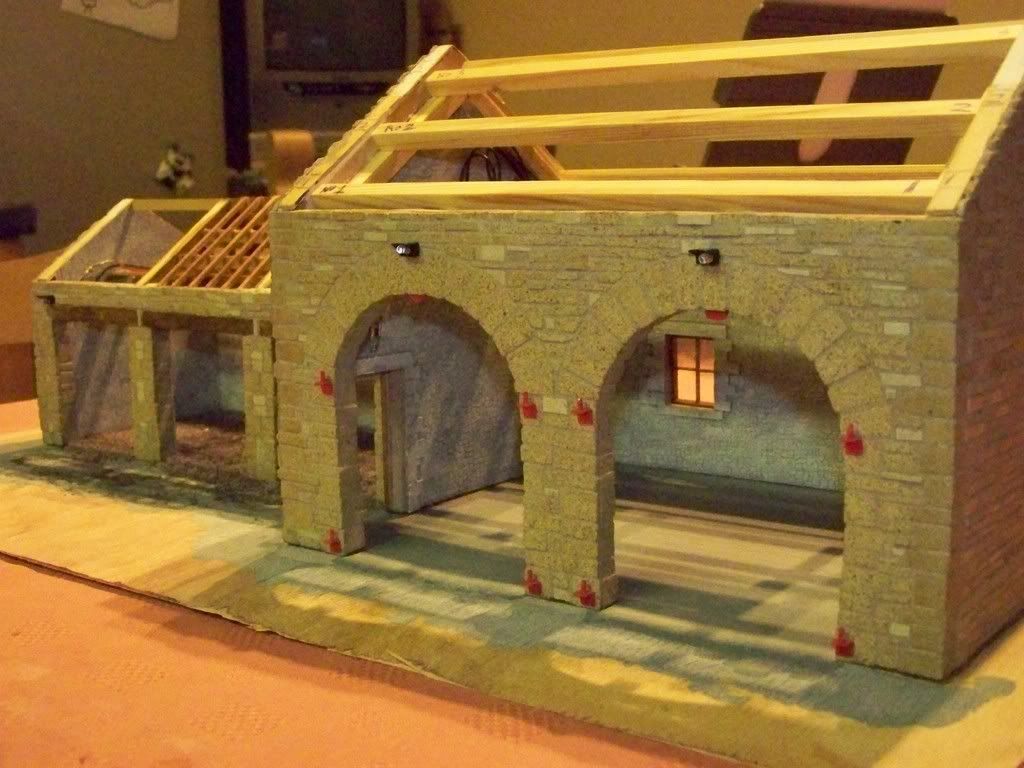
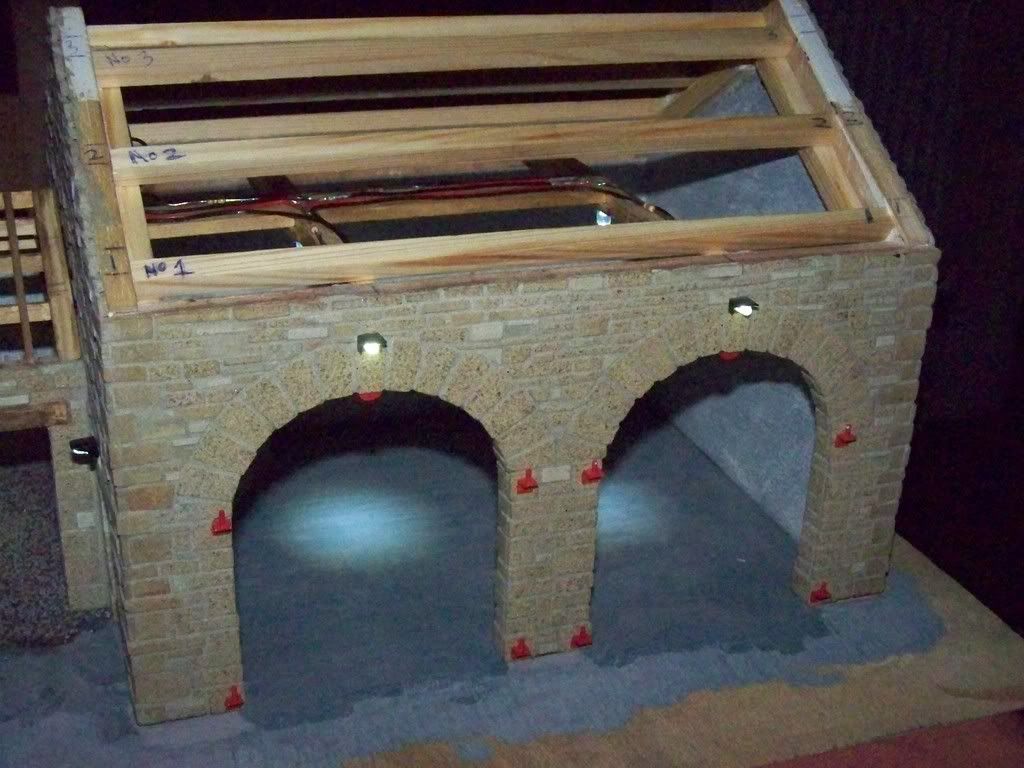
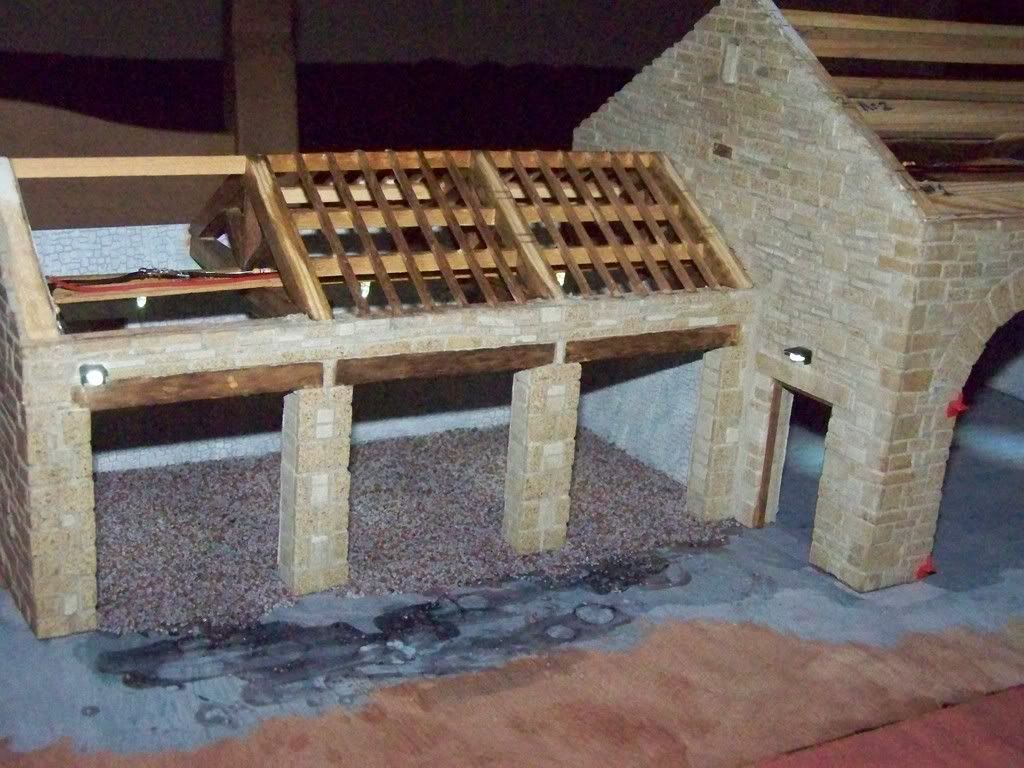
Hi Tris.. so here's the plan so far... the larger end of the building was the original barn, but the big arched doorway was stoned up and a new opening made in the gable, and extra windows added for more light - this will be the farm workshop with a mezzanine floor to the rear. The building to the left, which was also an original part of the farm, was the old workshop but as machines got bigger it just wasn't big enough, so that's why the barn was converted. The infill bit in the middle is just a general store.
Just been looking at Leverats farm, and the roof is looking really good, but I bet that it's been a bit time consuming.
-
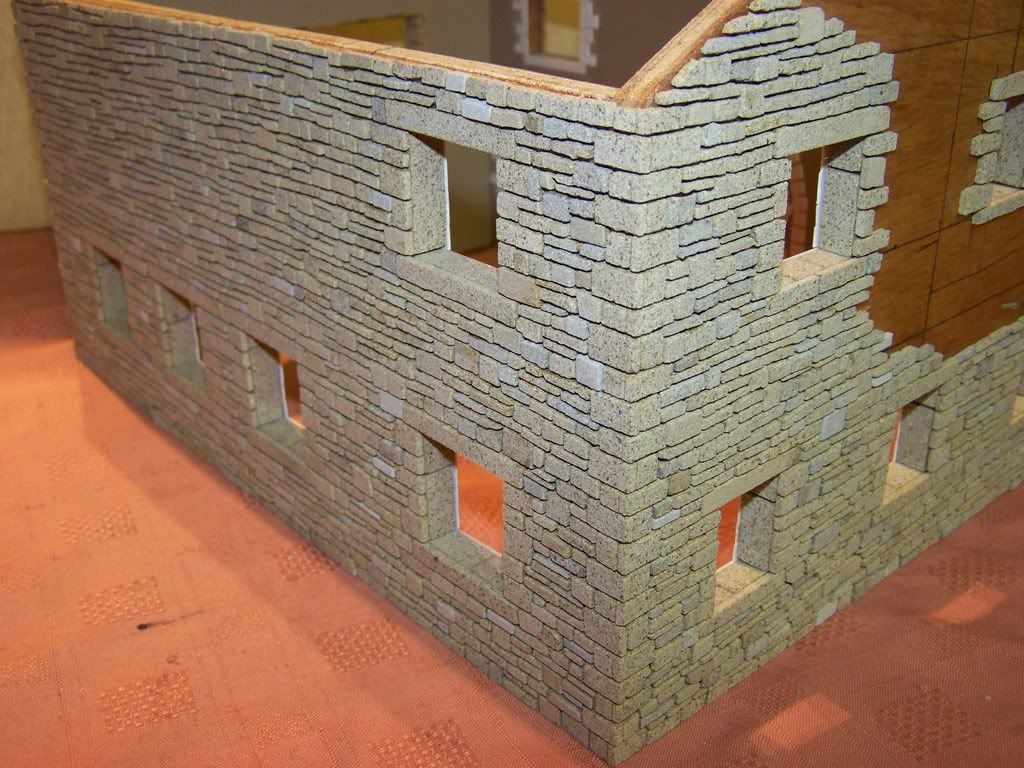
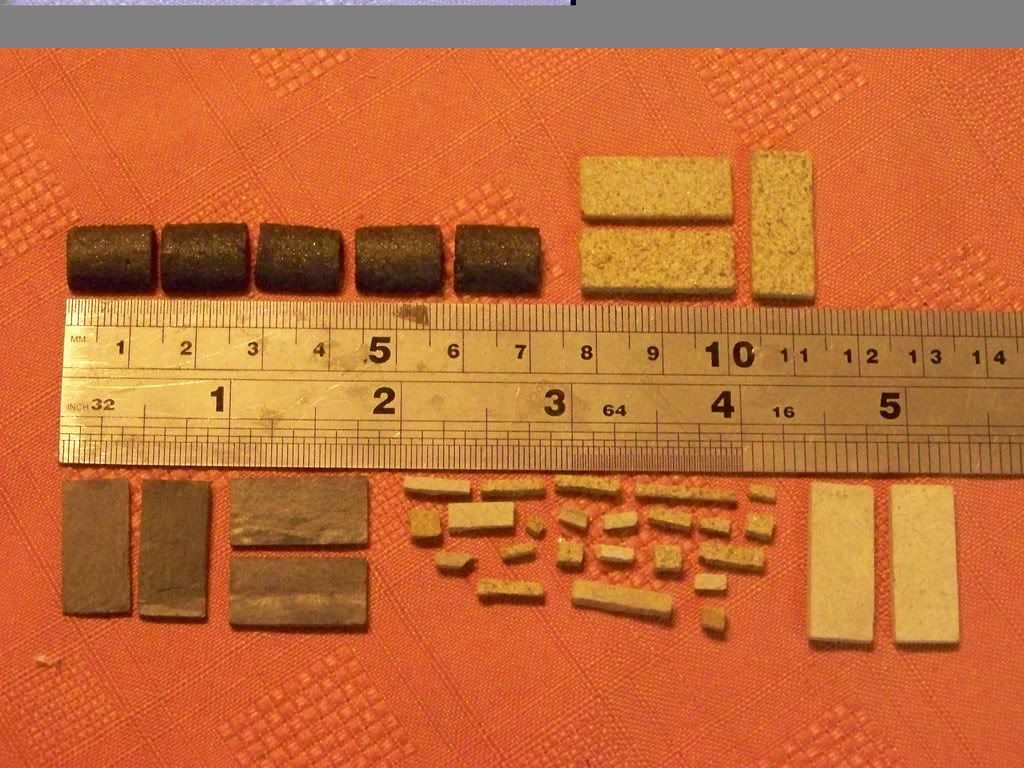
Hi Kris ... The stone is real stone - cut down with pincers to the various sizes I require. I buy the stone from a UK supplier in its bigger form, but unfortunately the price has just recently doubled, so this is not going to be a cheap project to say the least.
-
Hi FB ... I just had the frame cut out when it was Spalding so I reckon about 8 weeks so far..
-
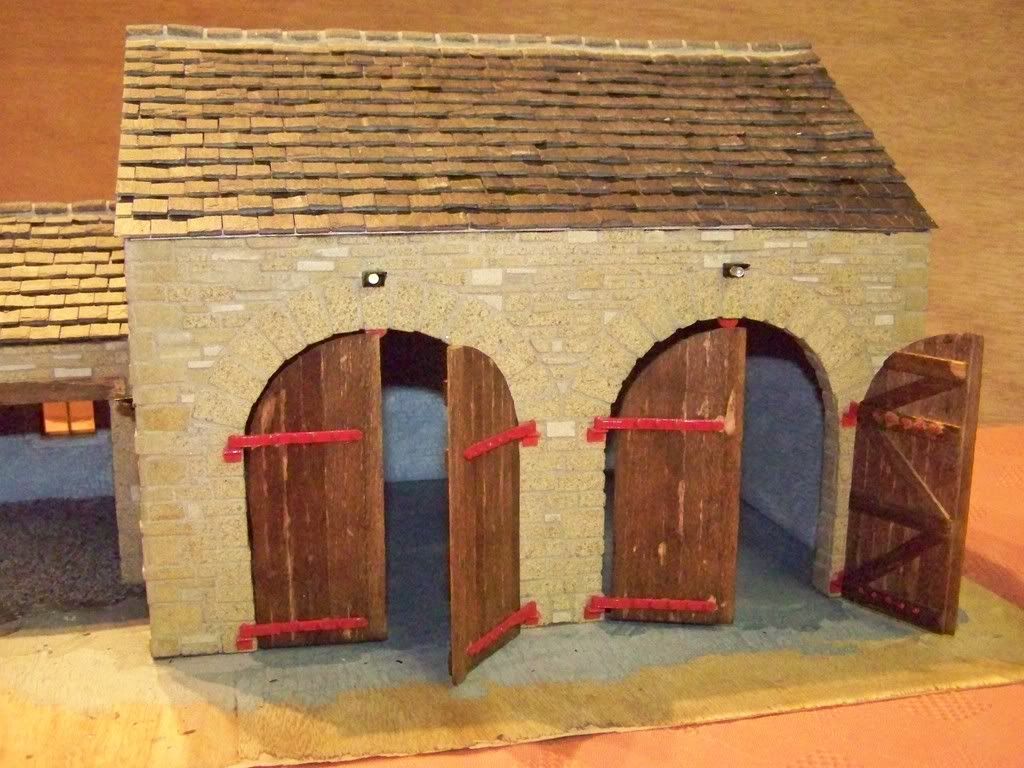
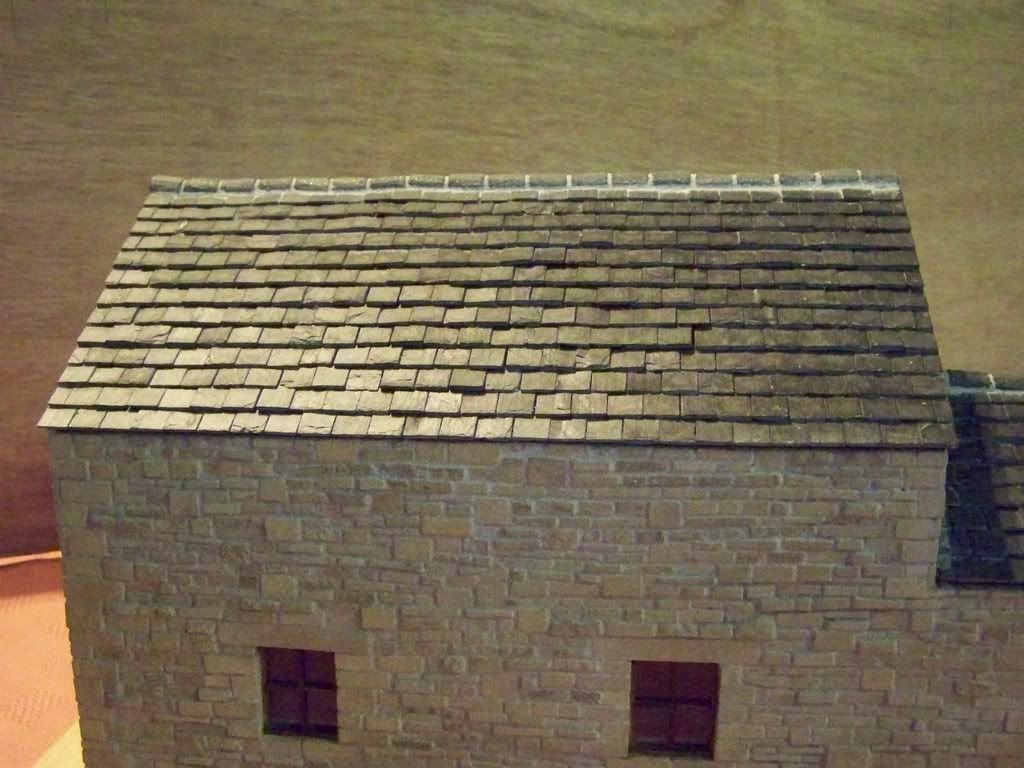
So here we are again folks - sat at the kitchen table with a pair of pincer nips and tweezers!
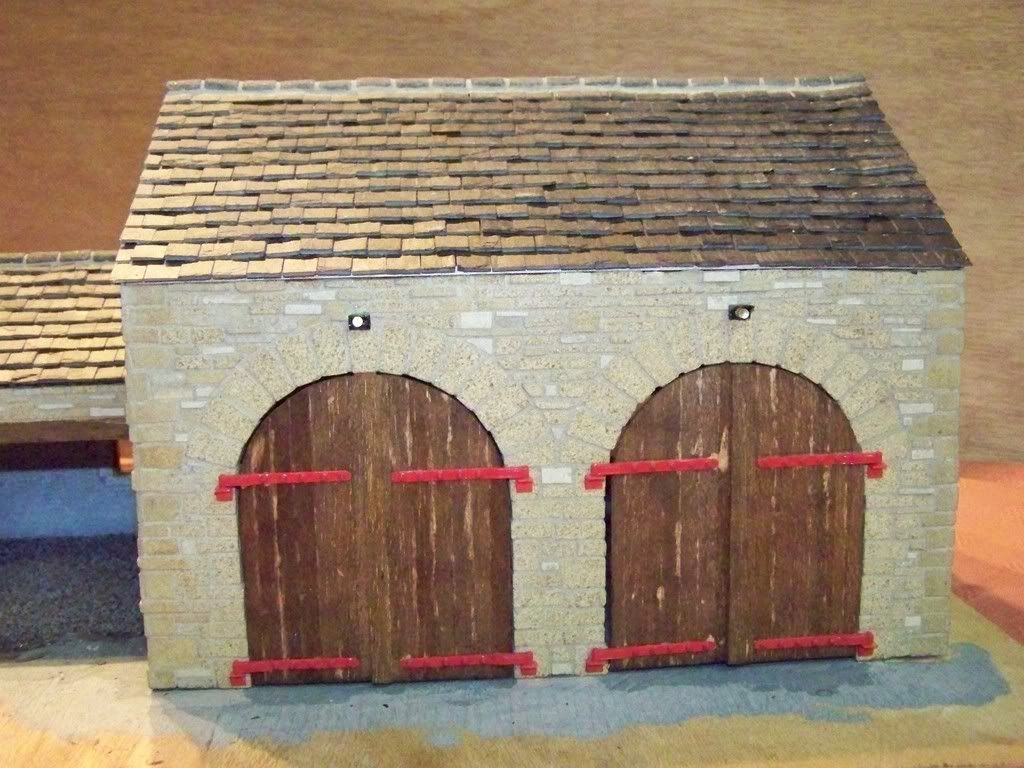
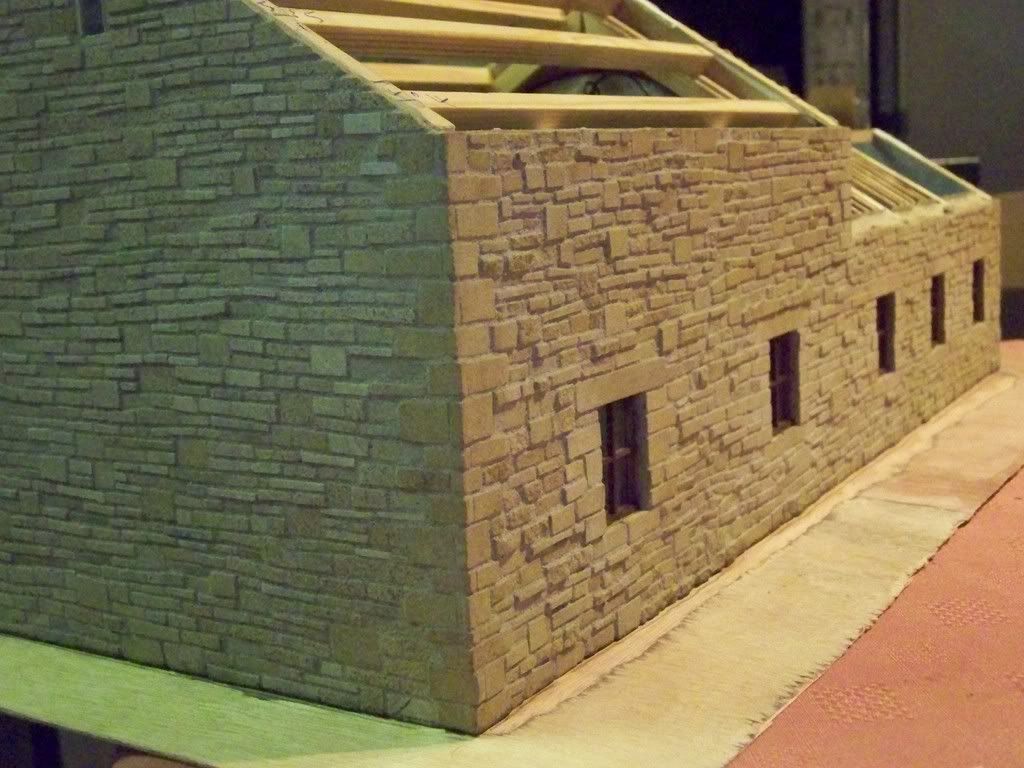
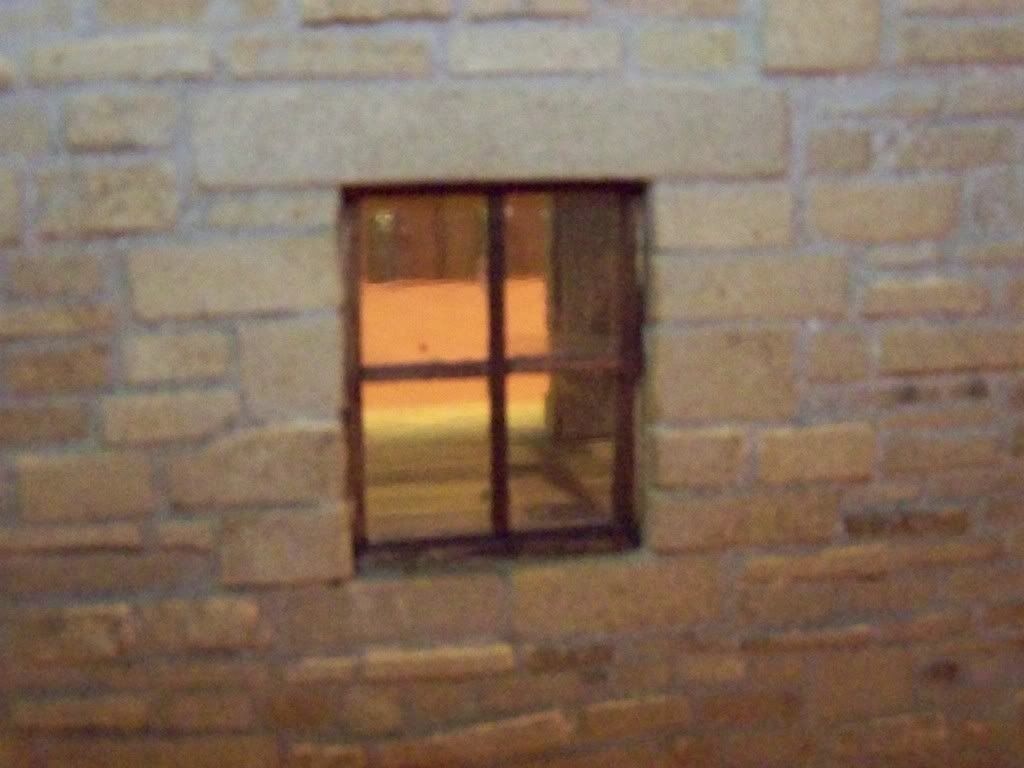
Construction now well under way on building mk11 - the main area was the old farm barn but the arched door has been bricked up and a new opening made in the gable, and extra windows added at some time in the past.
Its gonna be a slow one... but watch this space for udates!!

-
Good to meet you today Tris - Leverets Farm is a credit to you.
-
Great show today. Nice to put faces to a few names, and to see Leverets Farm in the flesh! Nice one Tris!!
Good journey down and just a thick flurry of snow from Retford up to Wakefield, then good clear roads up to Skipton on the way back - no problems though 'cos the wife was driving while I had a snooze!
-
Yes the wall is fixed to plasticard base, and it will be trimmed accordingly at a later date. If you want a close up I can bring the bit of wall to Spalding - just let me know.
I have been watching the progress on your project - its looking really good. Have you got your tiles sorted now.
-
Thanks for that. No I have never dry stone walled before - I've knocked plenty down though with a big bucket!!
-
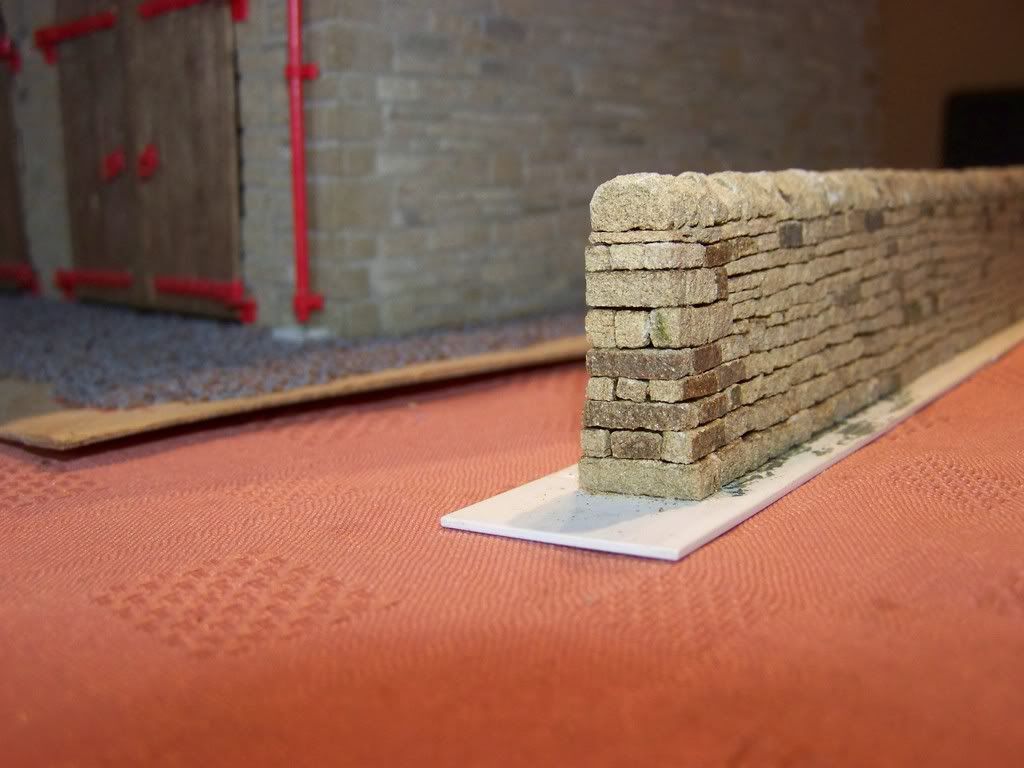
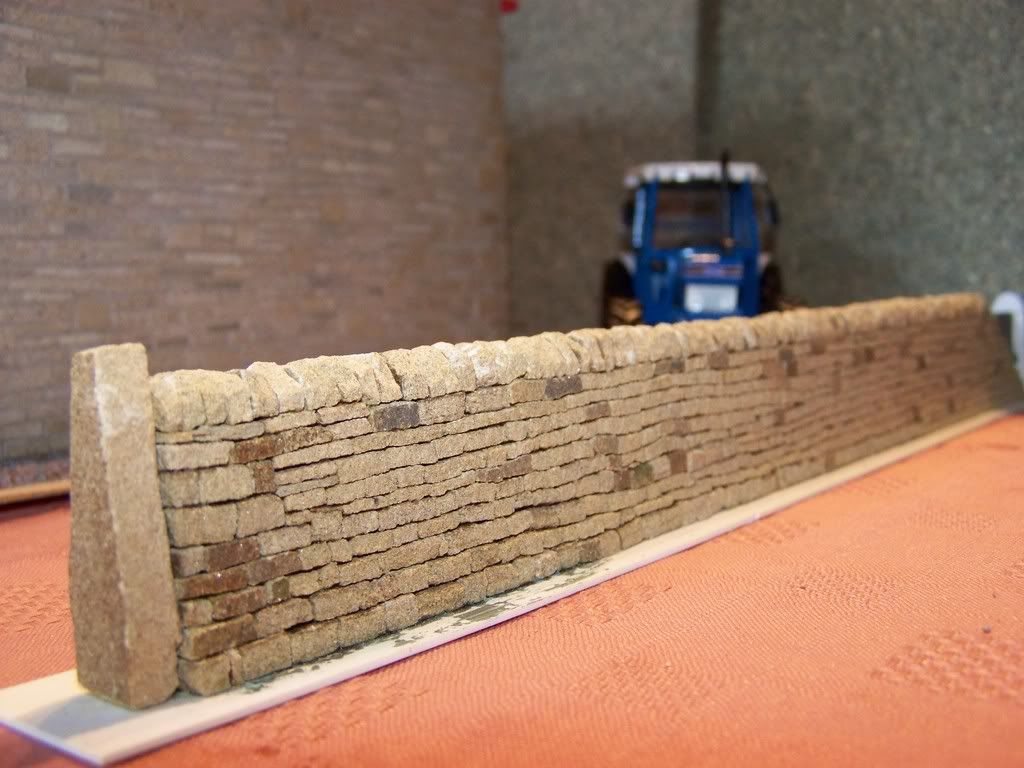
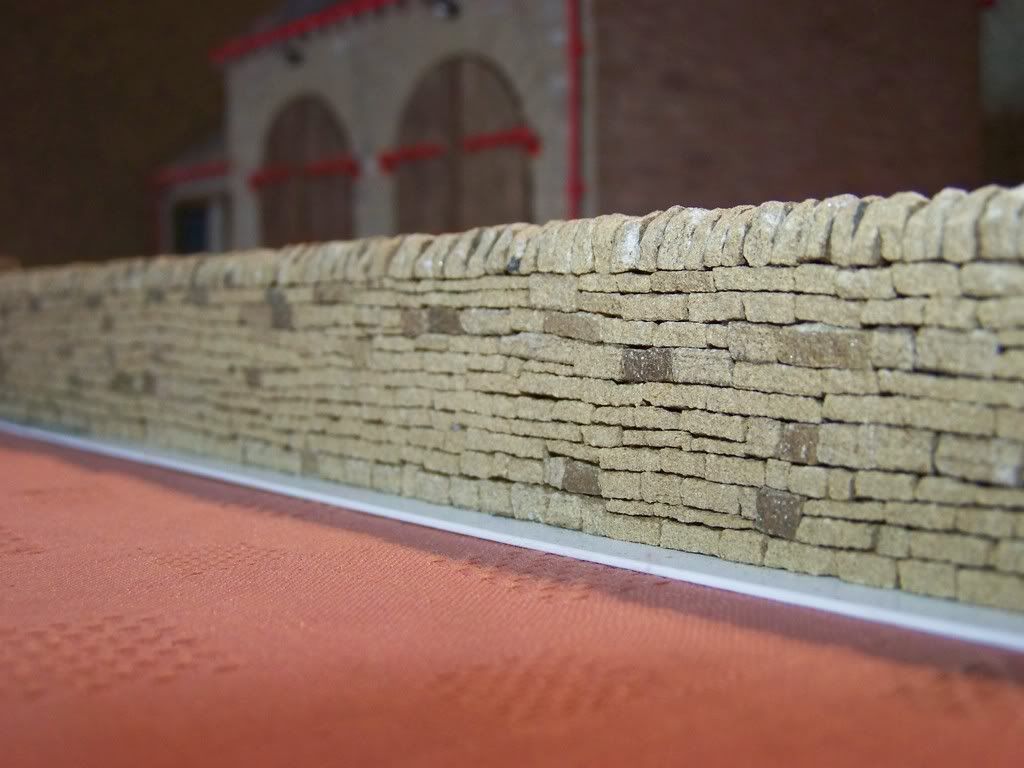
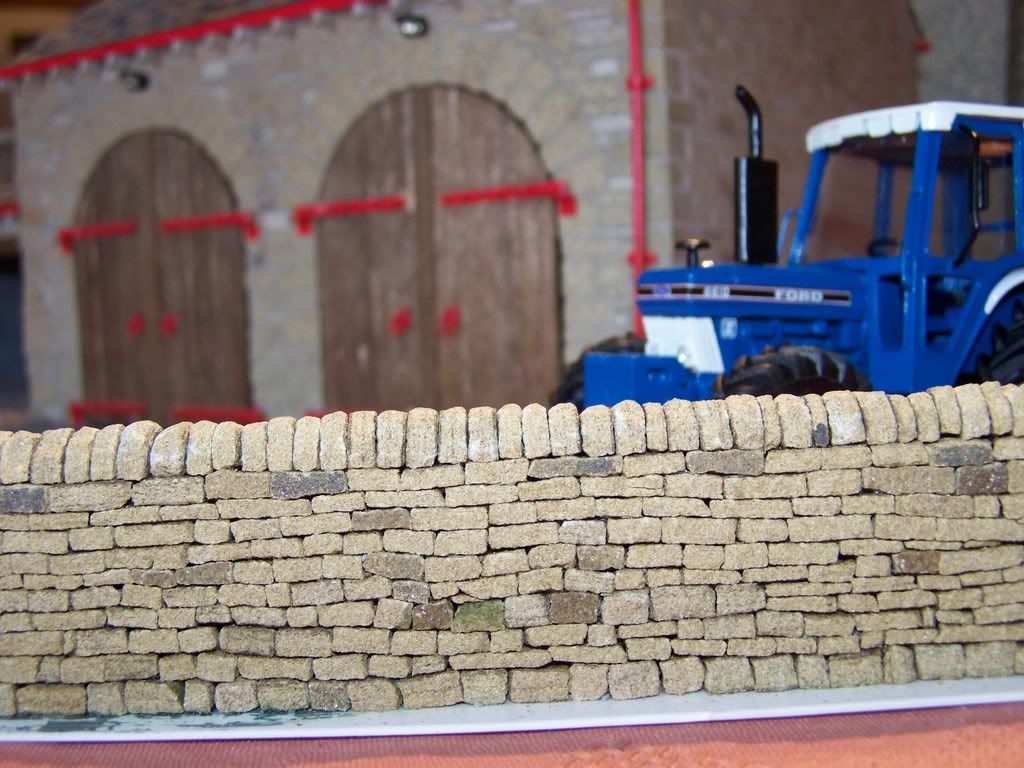
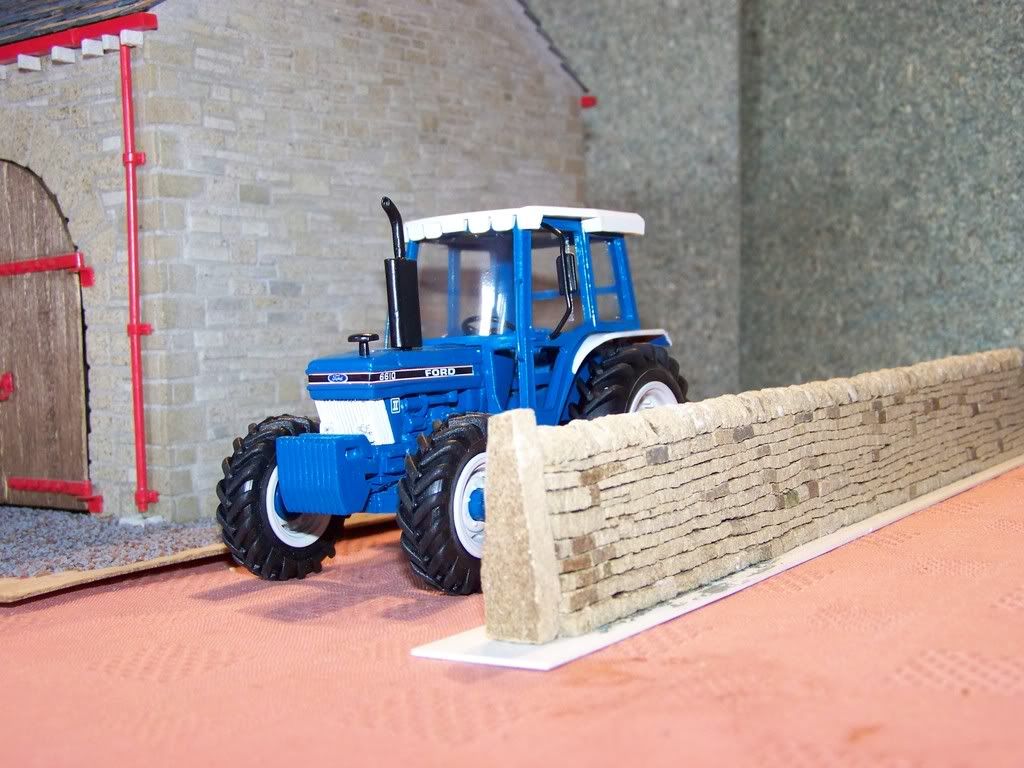
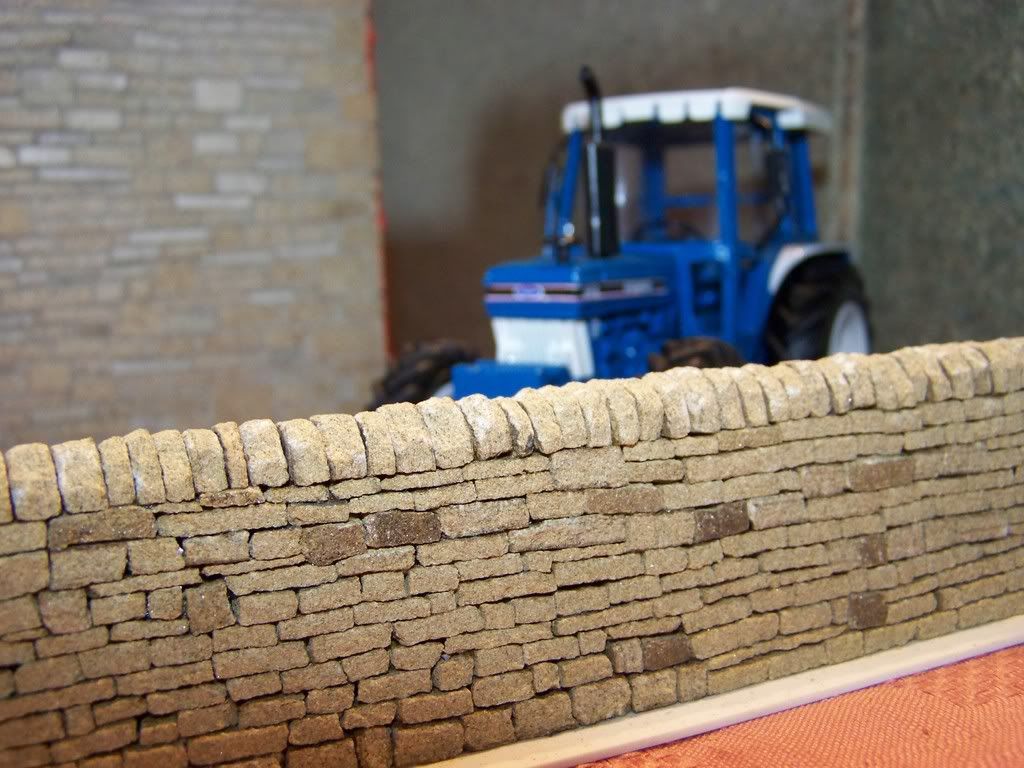
As promised earlier..here is the 1st part of the dry stone wall...it is approx 1 foot long, and it has taken about four weeks to do both sides. It was just a bit of a trial run to see how it would work out. The opposite end to the stone gate post has been left ragged back so that it can be walled into the next section. In total the full wall around this first building will be about 4 foot - buts its going to be a long slow job. The stone used is actually layers or beds from perished Yorkshire stone slates that I have got from the site I am now on, which I am just clearing after the demolision has been done.
-
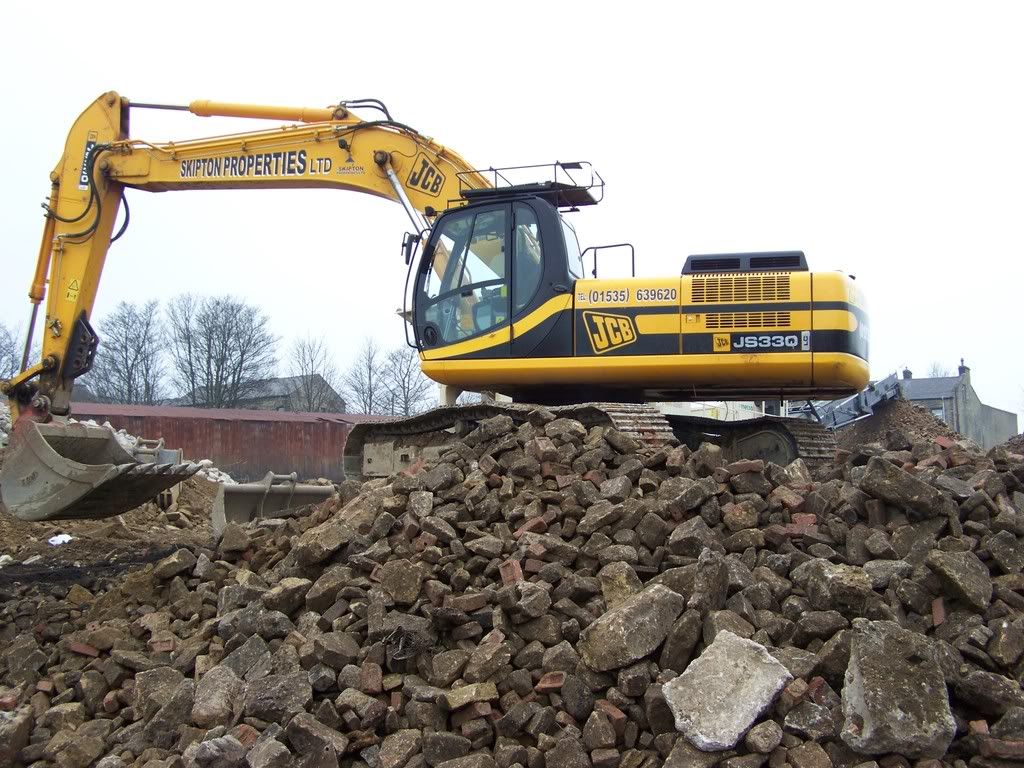
Rolls Royce of a crusher? You have got a Rolls Royce of a 360 there mate, what a beast. Don't see to many JCB's of that size down my way (Wiltshire). Not that many over 20t at all really. Is it a Sumitomo inderneath?
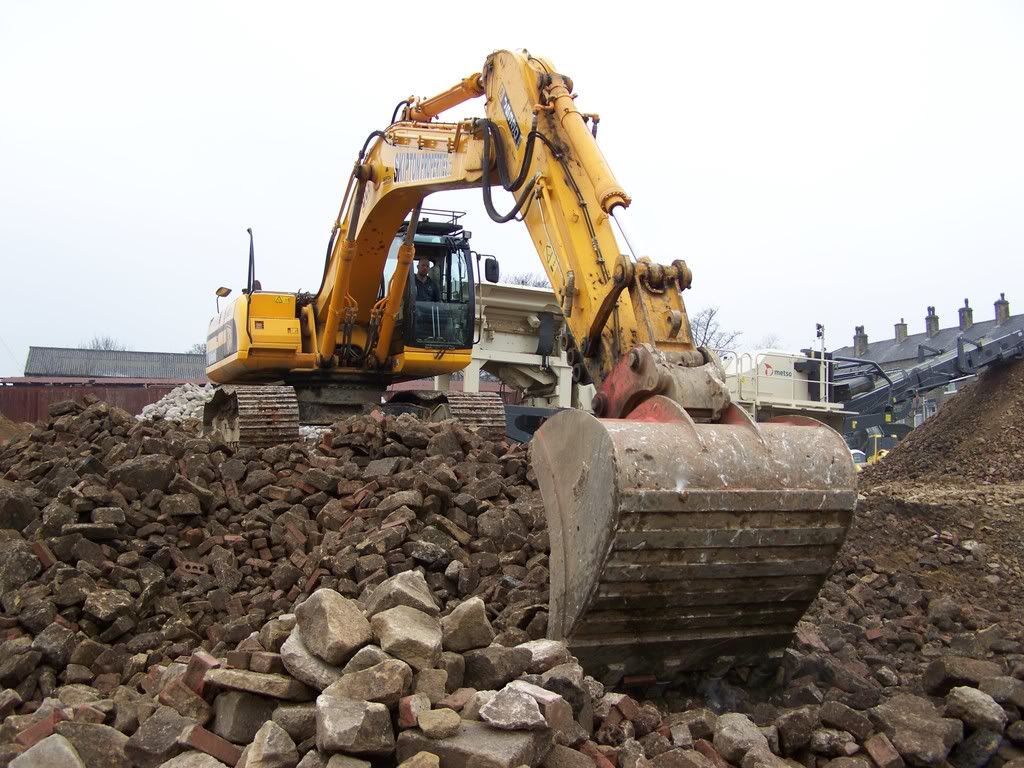
No its all JCB. Had it about 18 months. Great digging tool. It can load an 8 wheeler in 4 good buckets. Couple of weeks ago I did 800 tonnes in 3 hours with 5 wagons - and that wasn't even pushing it (butties etc). A real pleasure to drive! Upgraded from a JS220 to the JS330
-
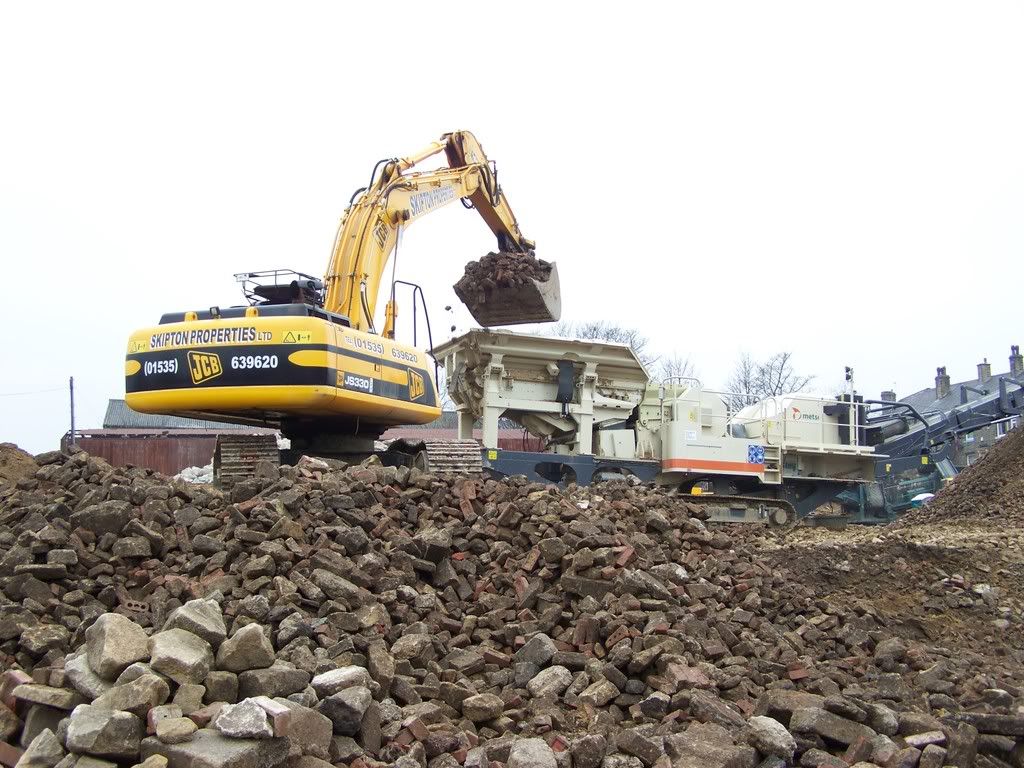
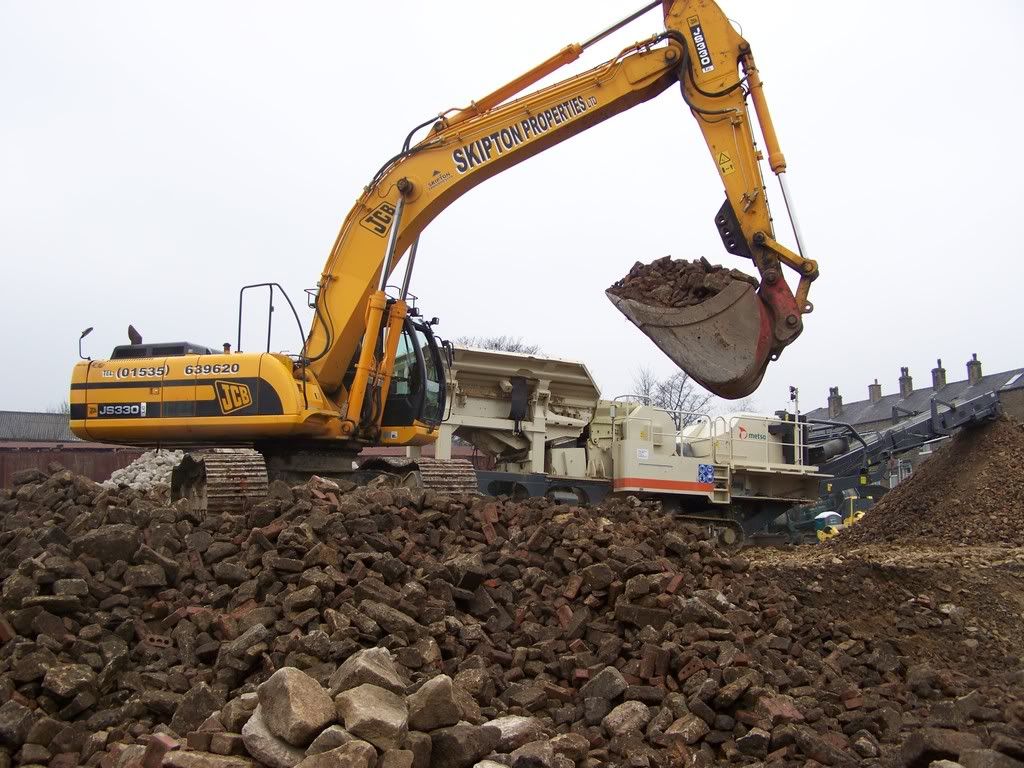
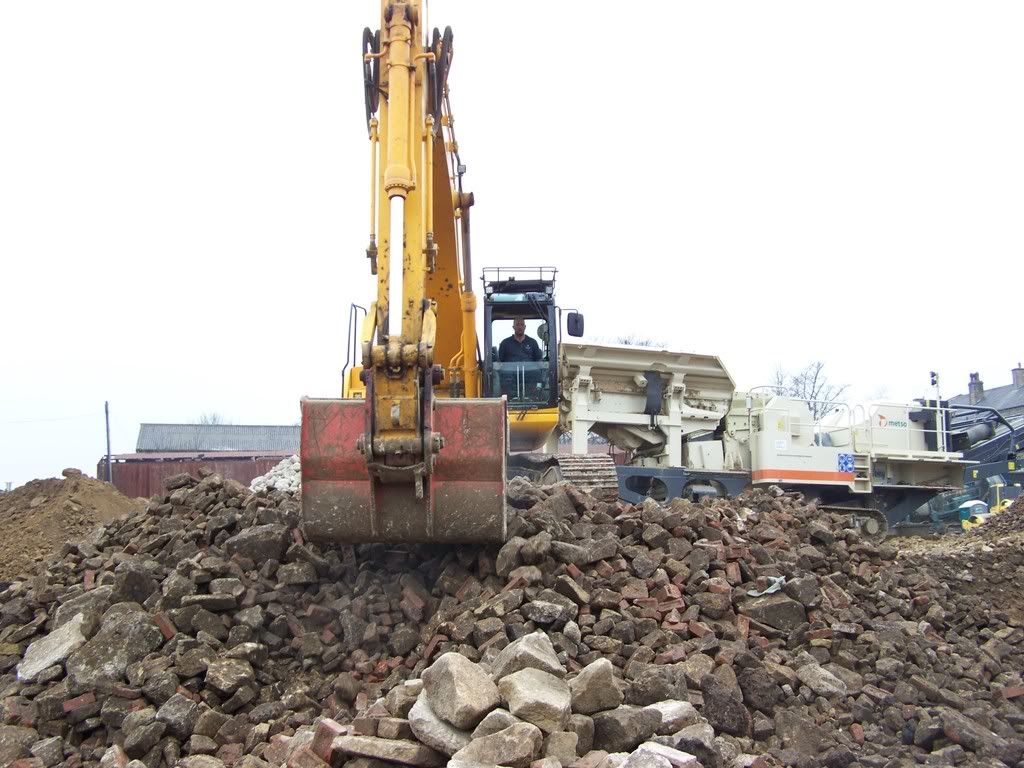
Work as usual...just taken delivery of a new rolls royce of a crusher - a Nordberg Metso Lokotrak 105 - so spent the morning loading it with the JCB JS330 LC
They call this work - seems like just fun to me...
-
Photos of the dry stone wall will be available soon, its a very slow job - nearly four weeks into it so far at about an hour and a half a night, and its only about 12" long.
I do intend to take the project to shows, but only when I have made enough to put on a good display.
-
Thanks for that. I am just on with a dry stone wall now, and I am also in the process of designing my next stone building.
-
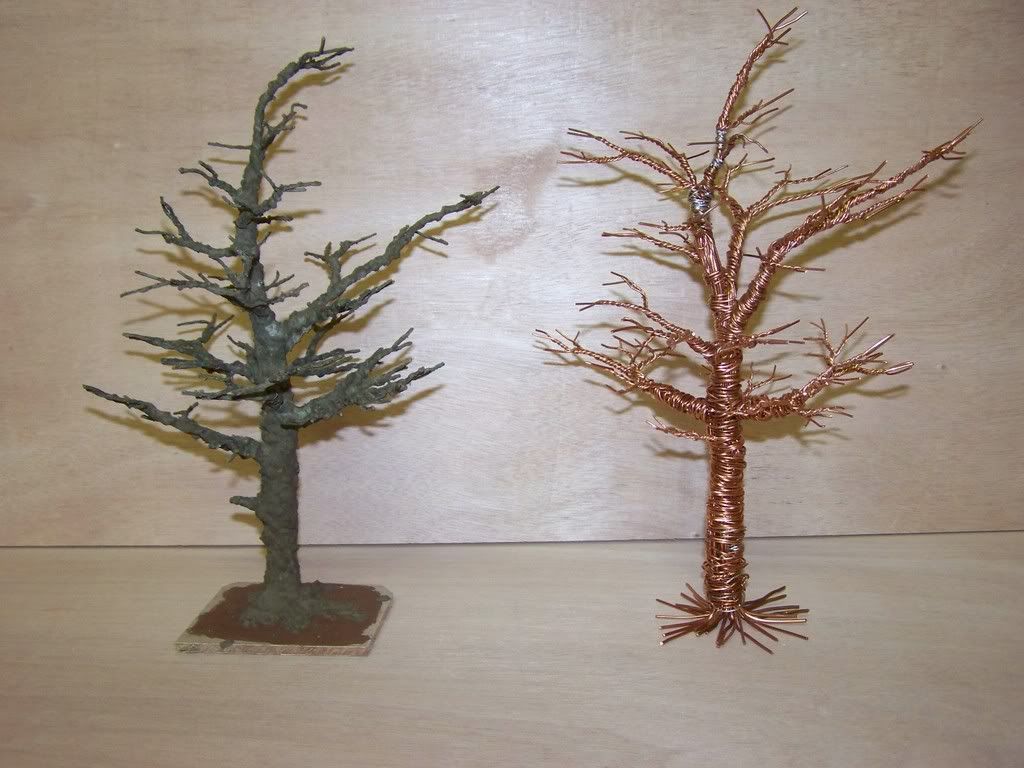
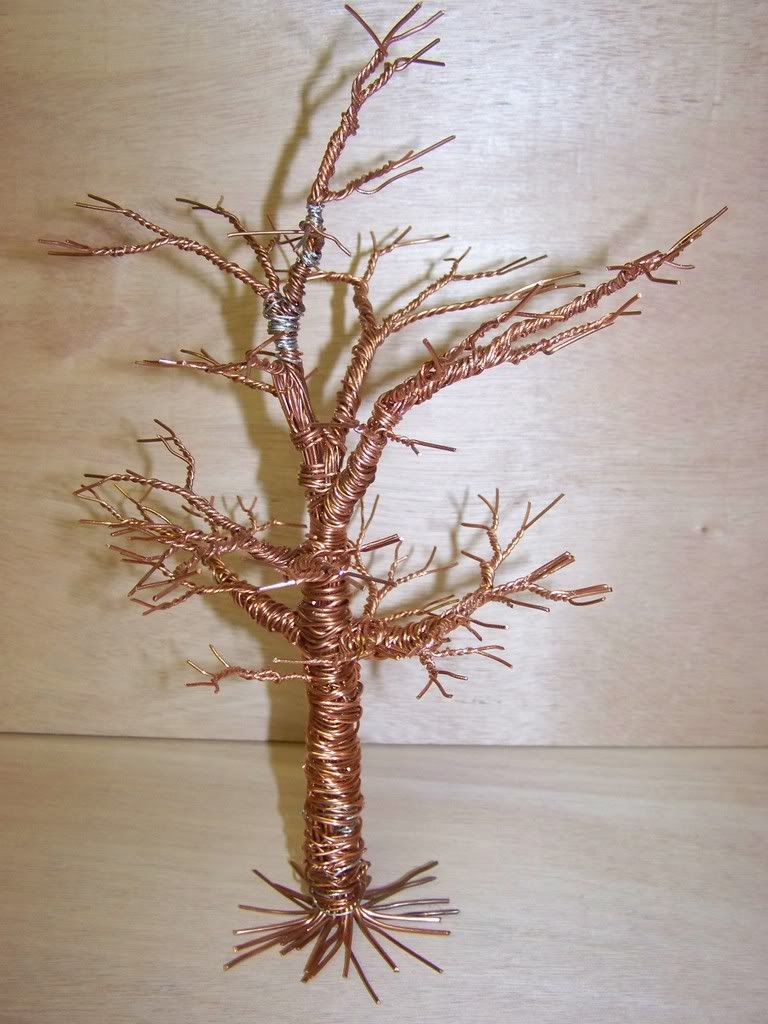
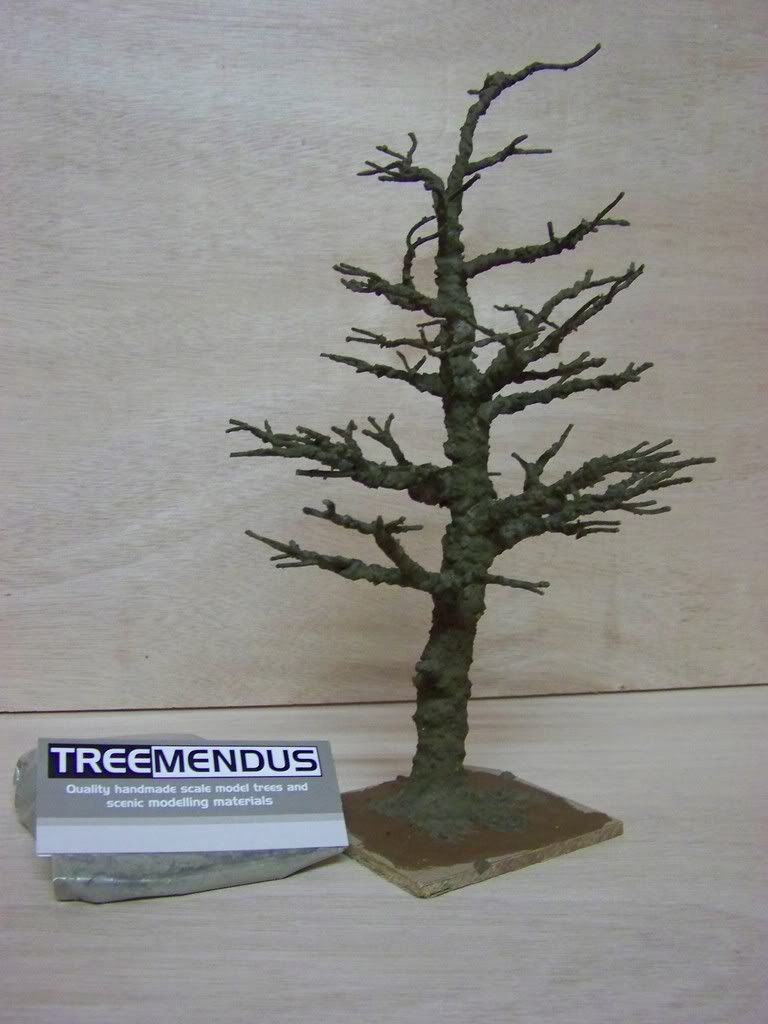
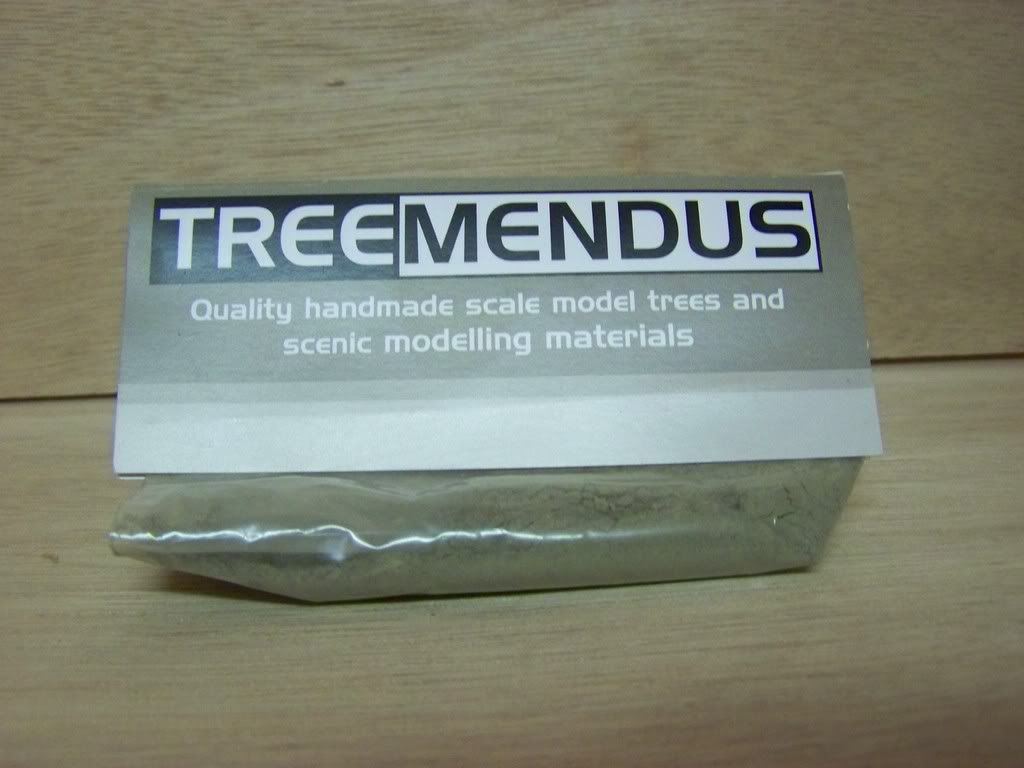
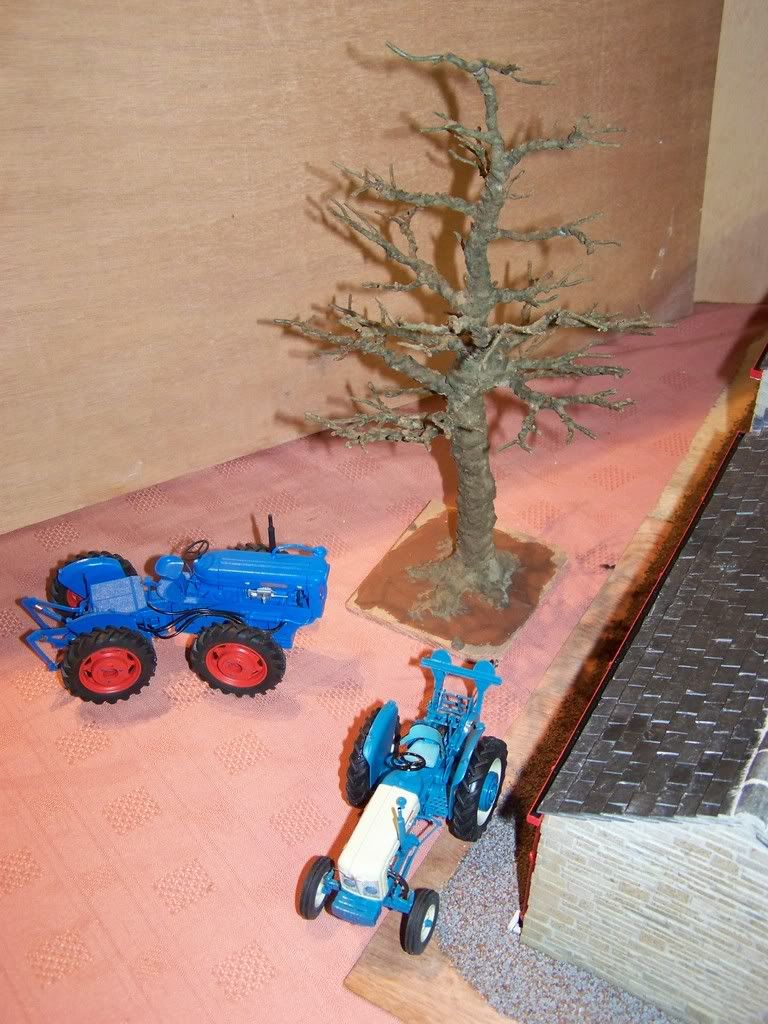
On my last posting of the progress of my stone built barn I included a tree that I have made. A few people have commented on it so I thought I would show how they are made. The pictures showing the twisted wire are fairly self explanatory, and if you save the picture then zoom in you can really see how the wire needs to be twisted. Then I covered it with watered down brown window sealant, then I came across a bloke at the NEC who was selling a product that gives a really good colour and effect to the bark - so I bought some and hey presto it looks like bark. He can be found at [ftp=ftp://www.treemendusmodels.co.uk]www.treemendusmodels.co.uk [/ftp]
-
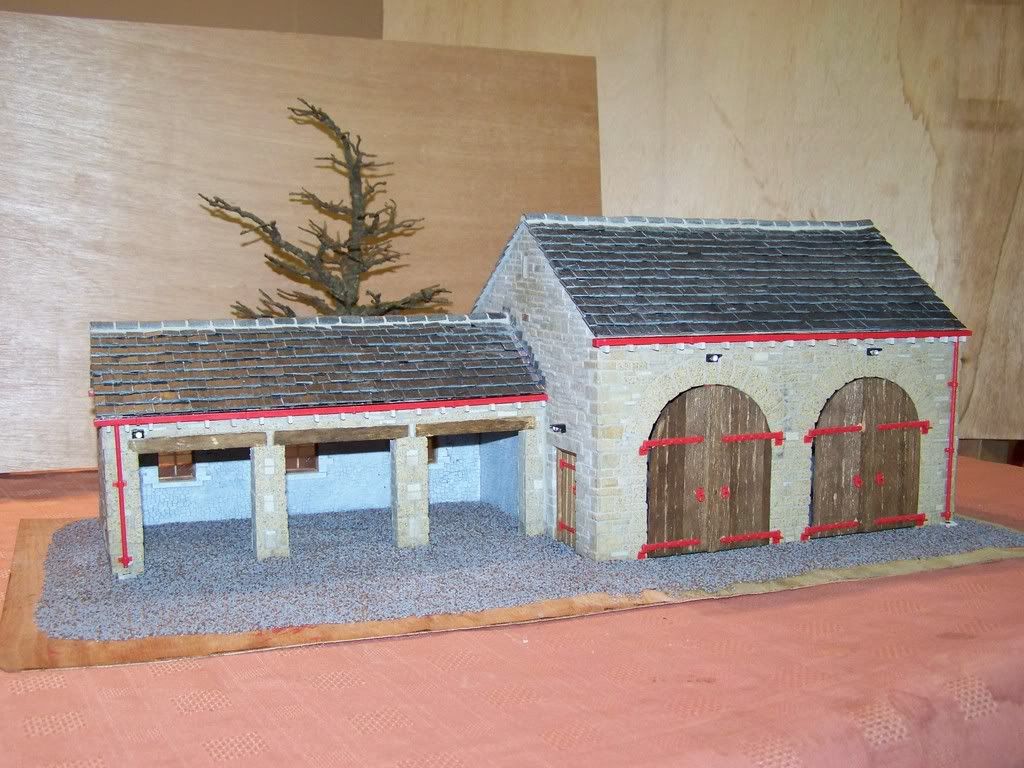
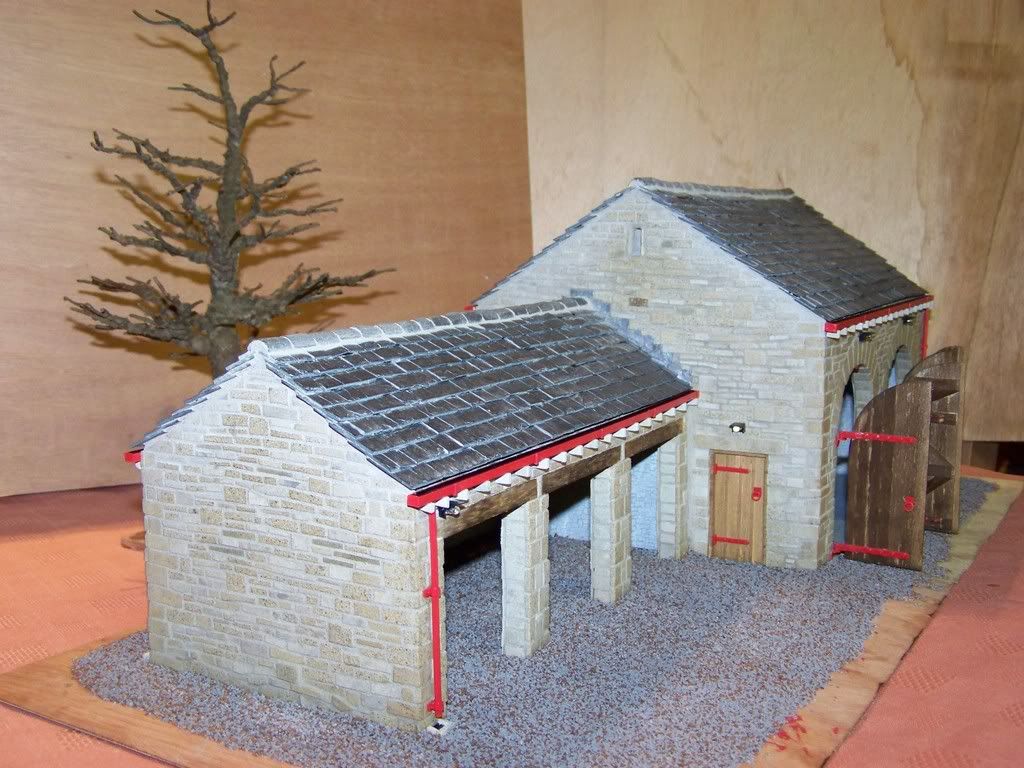
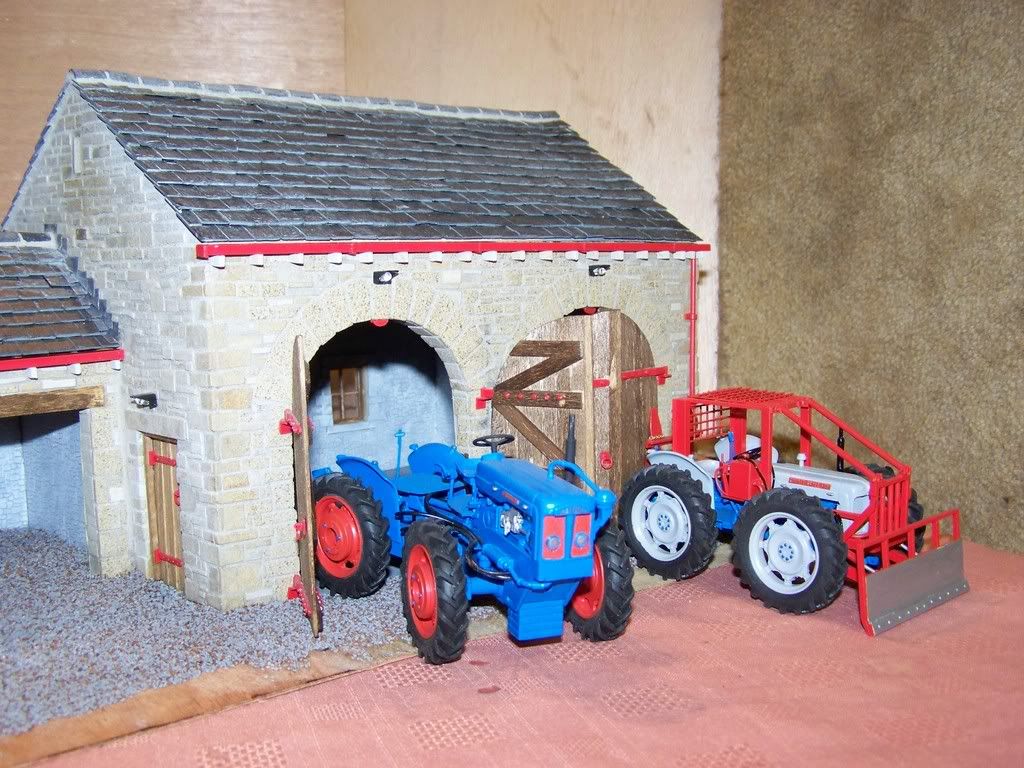
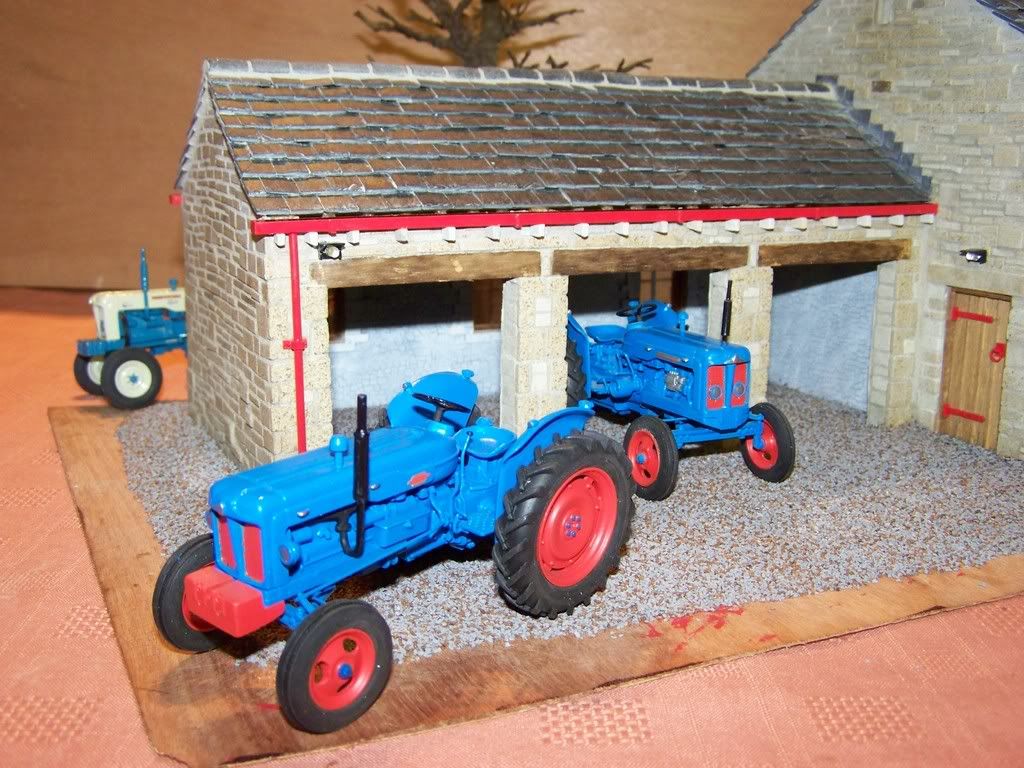
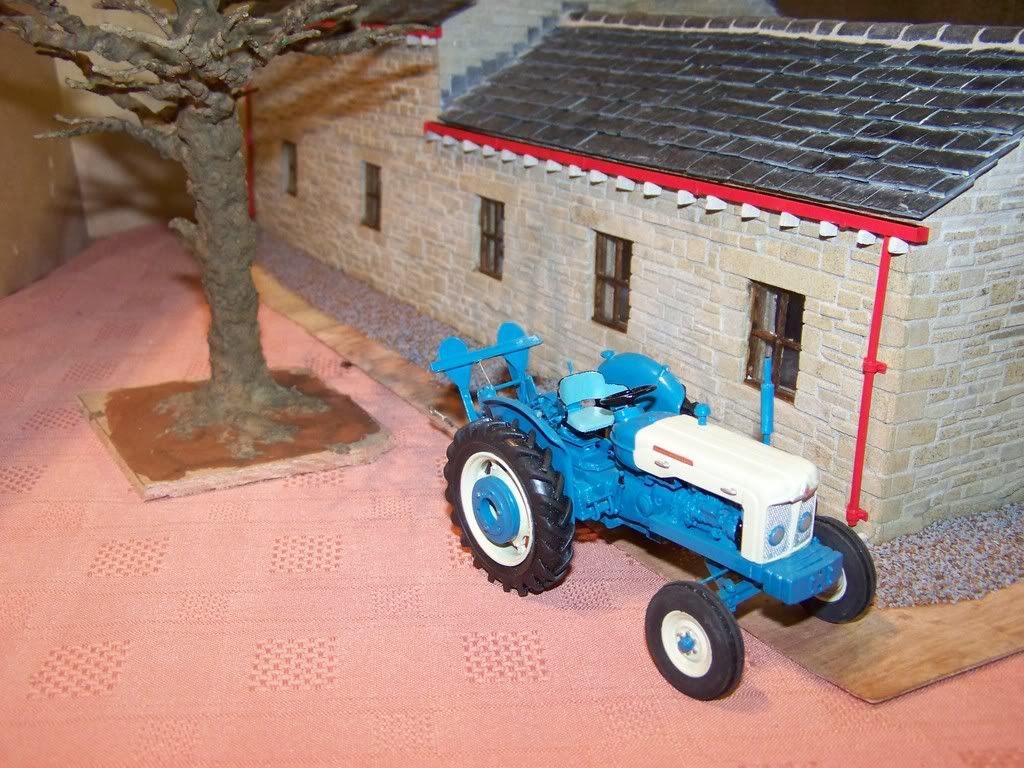
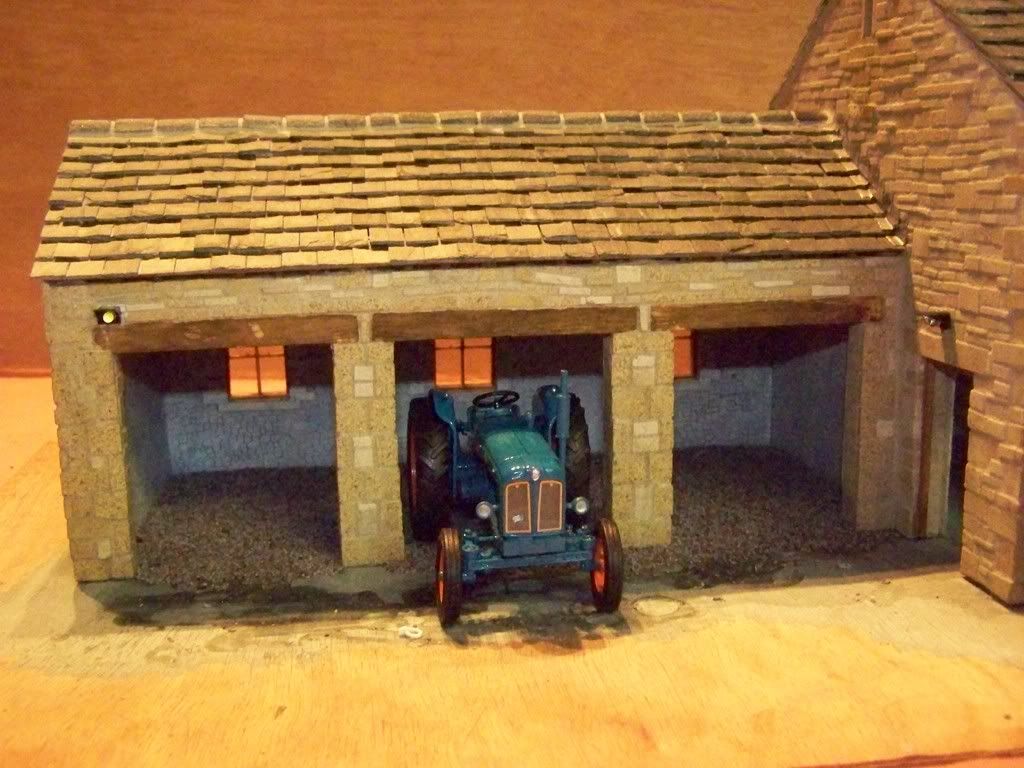
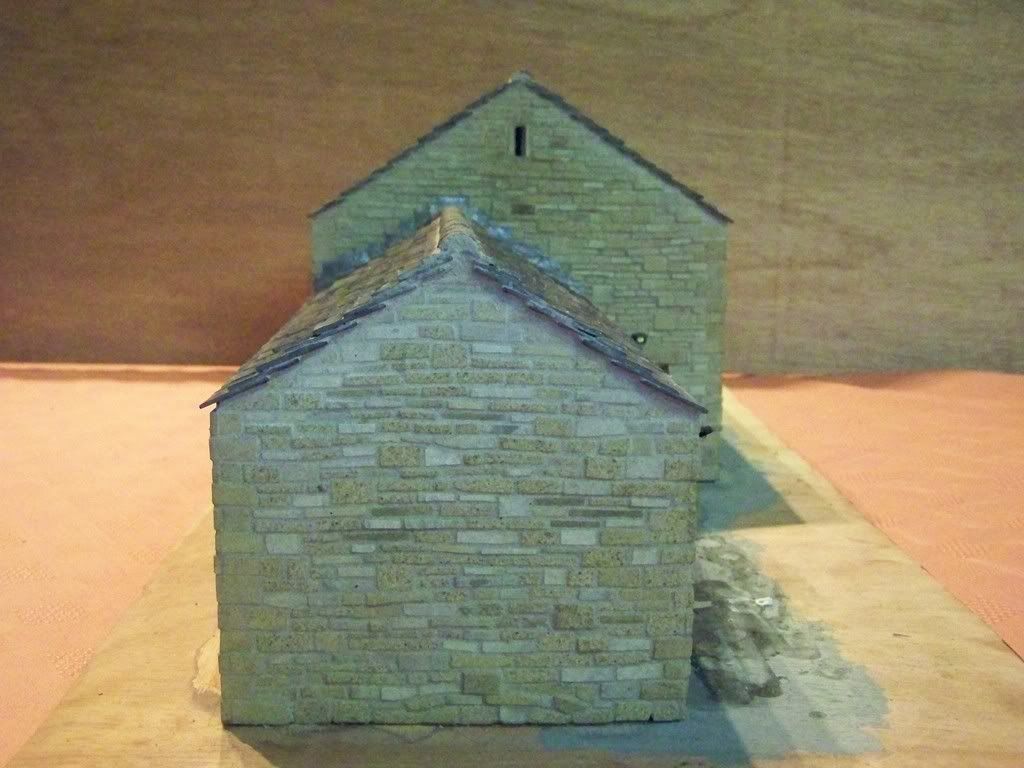
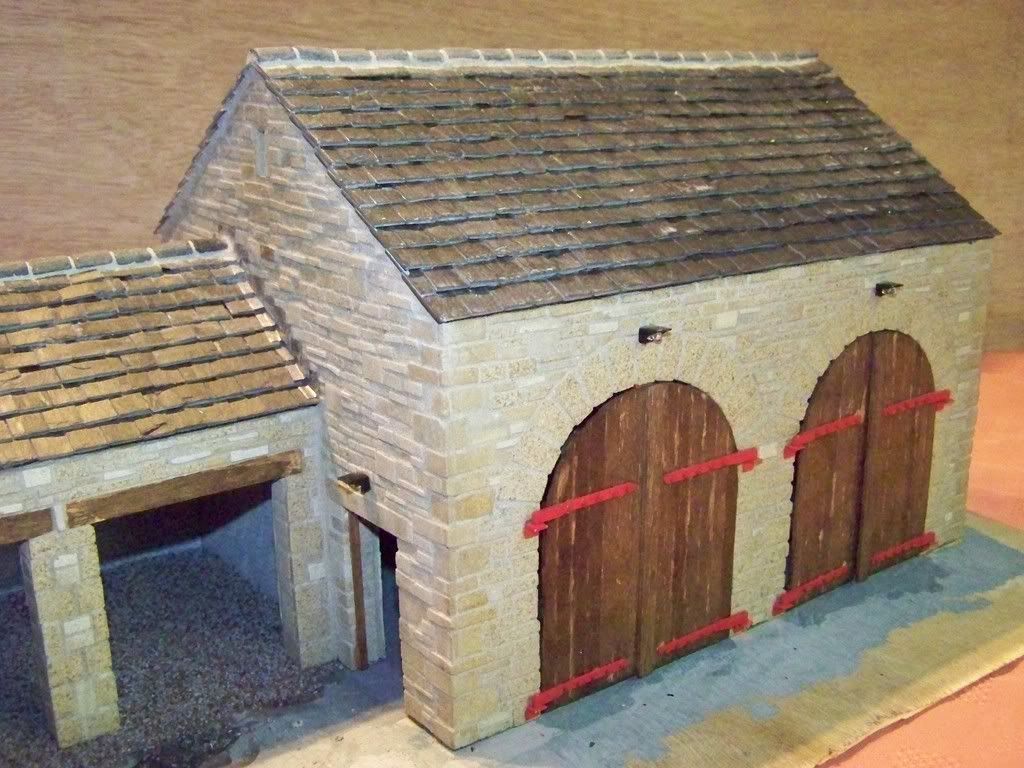
Well....after six long months....here it is the finished article....gutters and downpipes all on, drain covers in place, door handles all fitted and the edges stoned up. This building will now be put aside - on top of the kitchen cupboard no less - to be placed onto another board to be added to a larger layout at a later date. The tractors dotted around are all ScaleDown models built around eight or nine year ago so apologies for not being in the right colours. The tree in the background is a first attempt, being made of twisted together wire and coated with a grout like mixture bought at a model railway exhibition - which is always a good place to come across new ways of modelling and learn how its done.
Now on with a bit of tractor modelling for a while to catch up!
So it just needs me to say a very big thank you to everybody for their comments and enthusiasm. THANK YOU!

-
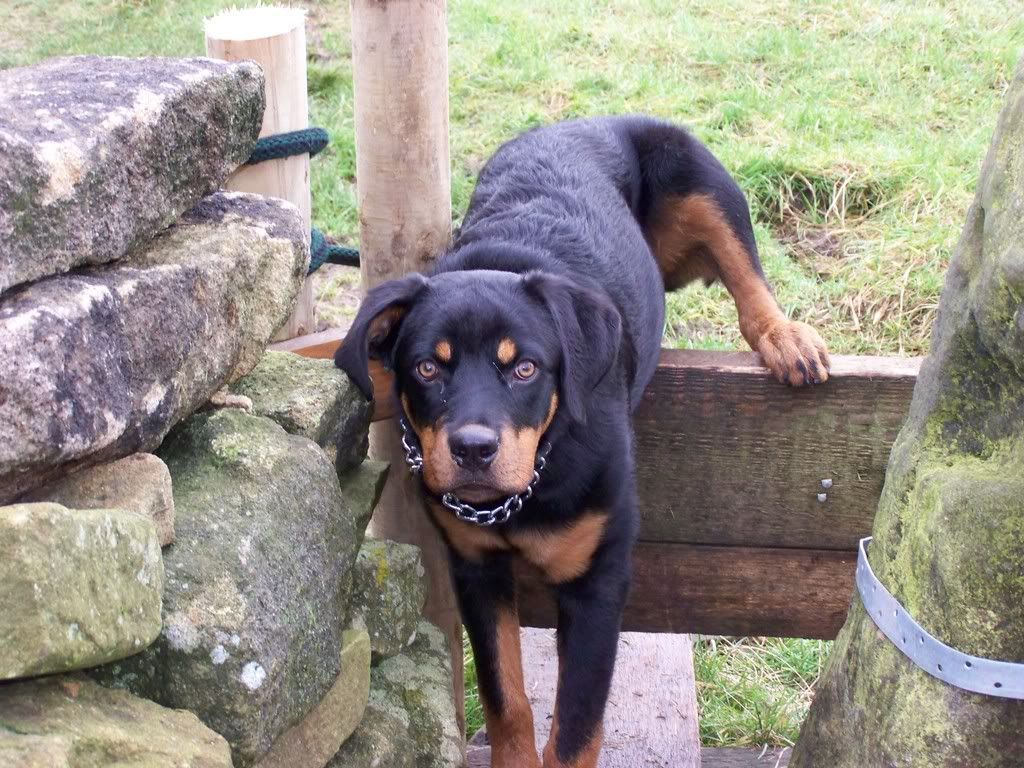
As I posted earlier..our Nell had her 1st tractor run today - here she is caught just getting over a stile during a photo moment...
-
This is Nell - 6 and a half month old Rottweiller and 5 stone...big softy really..the wifes Christmas present that arrived two months early. She - the pup - has got her 1st tractor run on sunday!


-
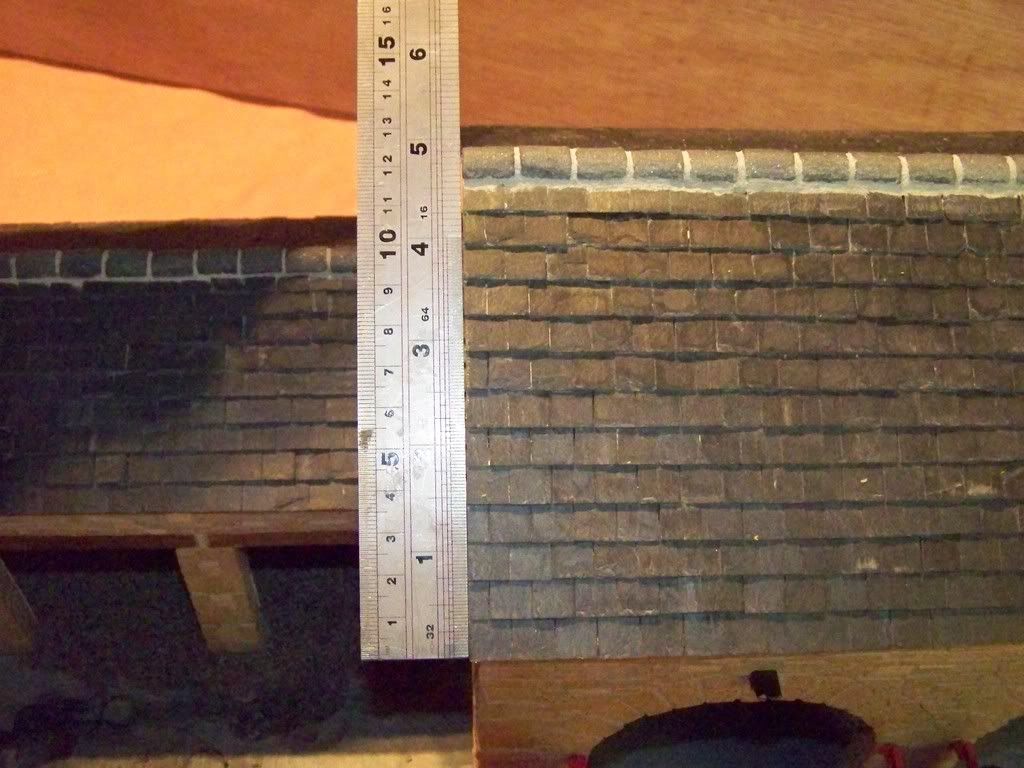
Christmas Day..what a perfect day to do a bit of roofing!!
Just need the guttering and down spouts, door handles and side door. Then put aside to be built into the next project....

-
speachless mate, looks real,almost expecting to see old ford up there fitting the roof
when you say cut the blocks down, how musch comes of each one roughly
Well each piece of stone was originally about 10mm x 25mm x 2 to 3mm thick. So I just nibbled them down with a pair of very small pincers to get whatever size i wanted...from small pieces at about 1mm x 10mm then up to jumpers at about 3mm x 15mm or square ones..whatever looked right. I spent hours nibbling the pieces down to assorted shapes and sizes then just basically walled them in just in random courses.
-
I am truthly, absolutley and totally honst when I say this JCB BLOKE, this is the best model building of any scale I have ever clapped my eyes on. It is an astonishing piece of work. You don't seem to hve built it as a model in a sense but instead as a rue life like building. Everthing about it just looks totally real, the timber, the arches, the corner joints. . .. This really is something to marvel at and I think before long I will just have to try my hand at one of these. Scaloox? What Scaloox!!!!!
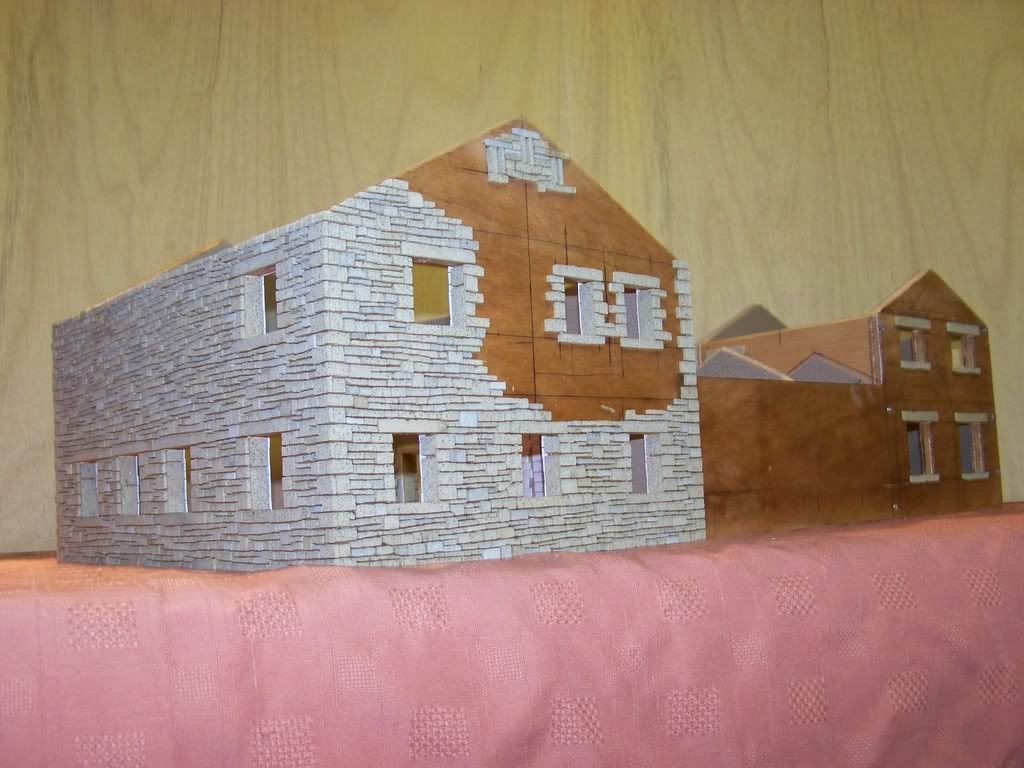
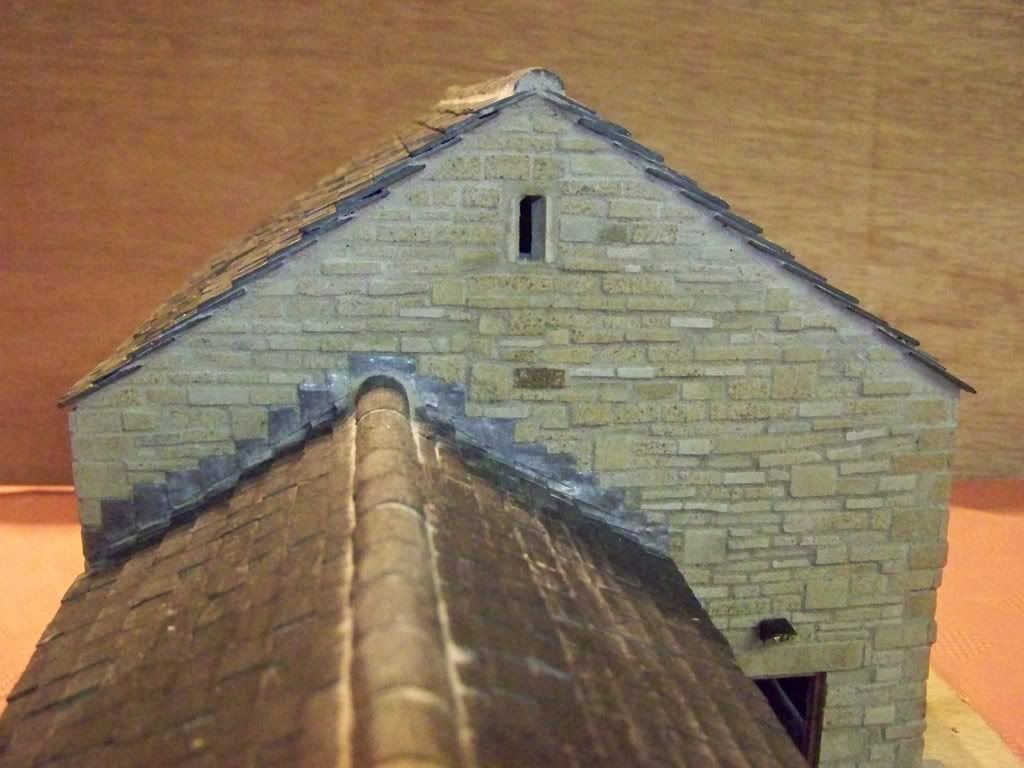
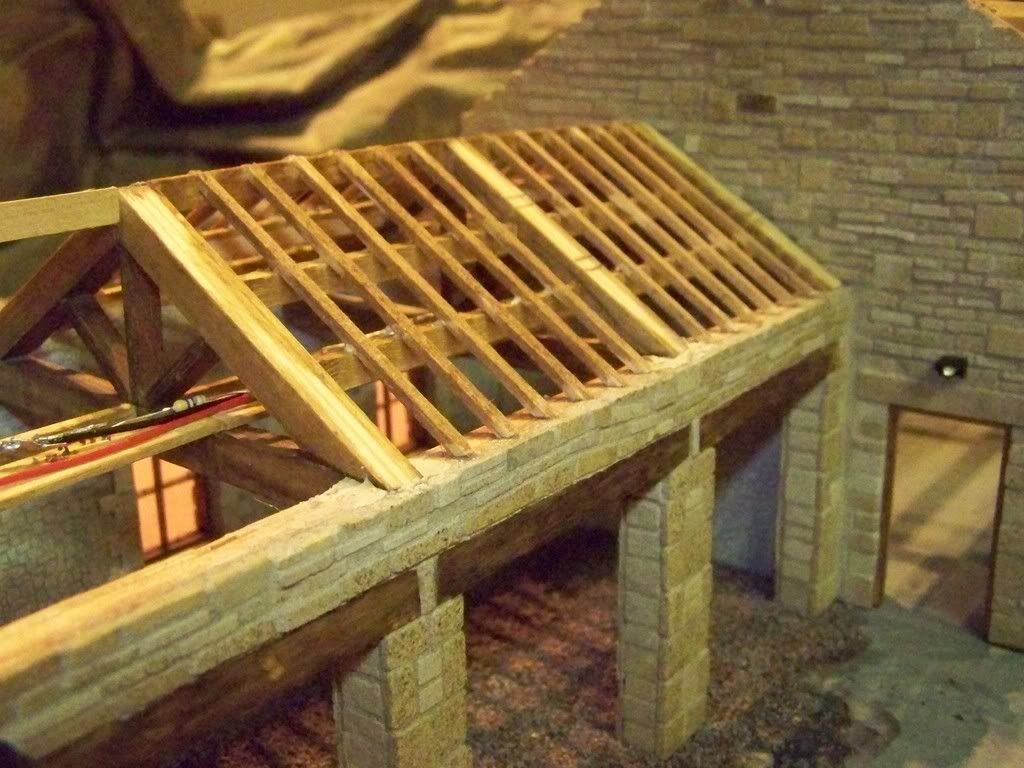
I am trying to make the building using scaled down materials ie. the timbers are proper timber and the stone is proper stone etc...just cut down to size by myself as required. I am also trying to build it just as a full size building would have been made so that it looks right from the inside as well - even though the inside of the roof section won't be seen once the slates are on, but I will know that it is there and not just a facade.........

-
What a great building, it will set your Hunslet off a treat !.
Can't wait for the Hunslet to arrive - thanks to everybody for their comments, it's good to be appreciated......
Watch for further updates...
-
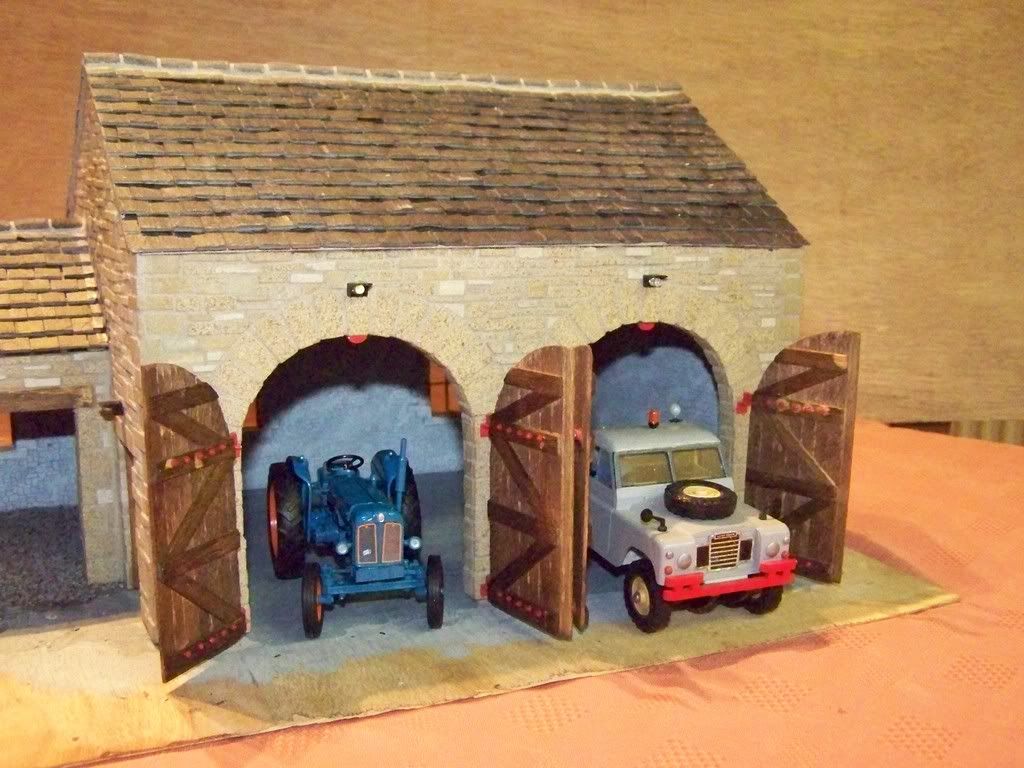
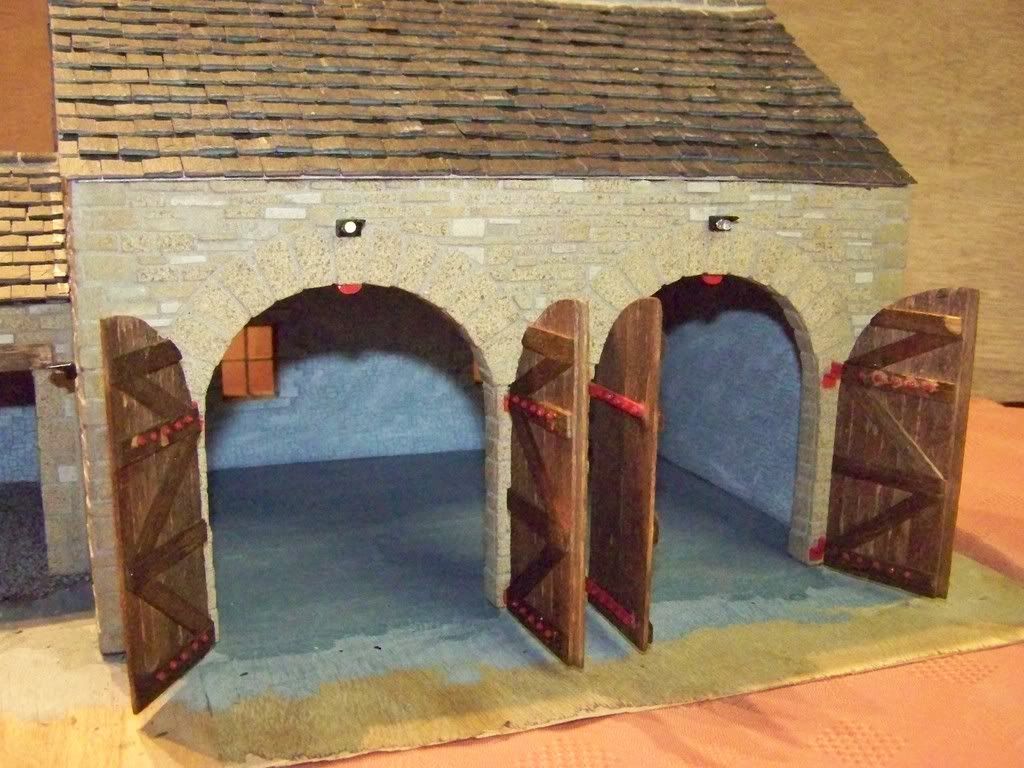
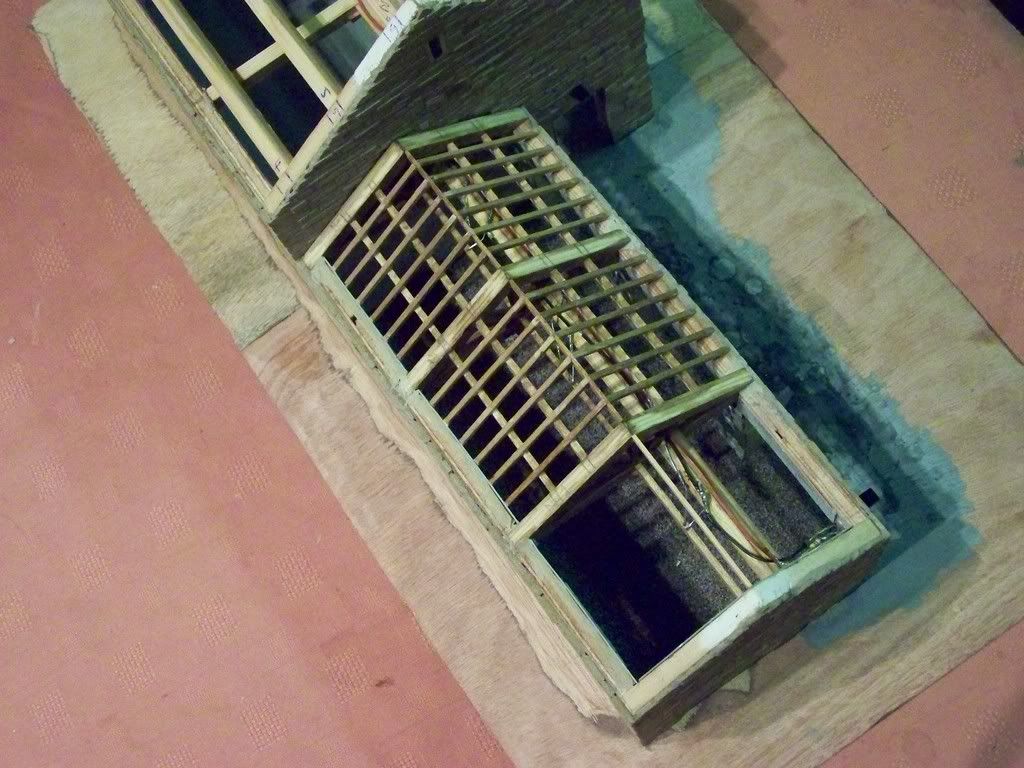
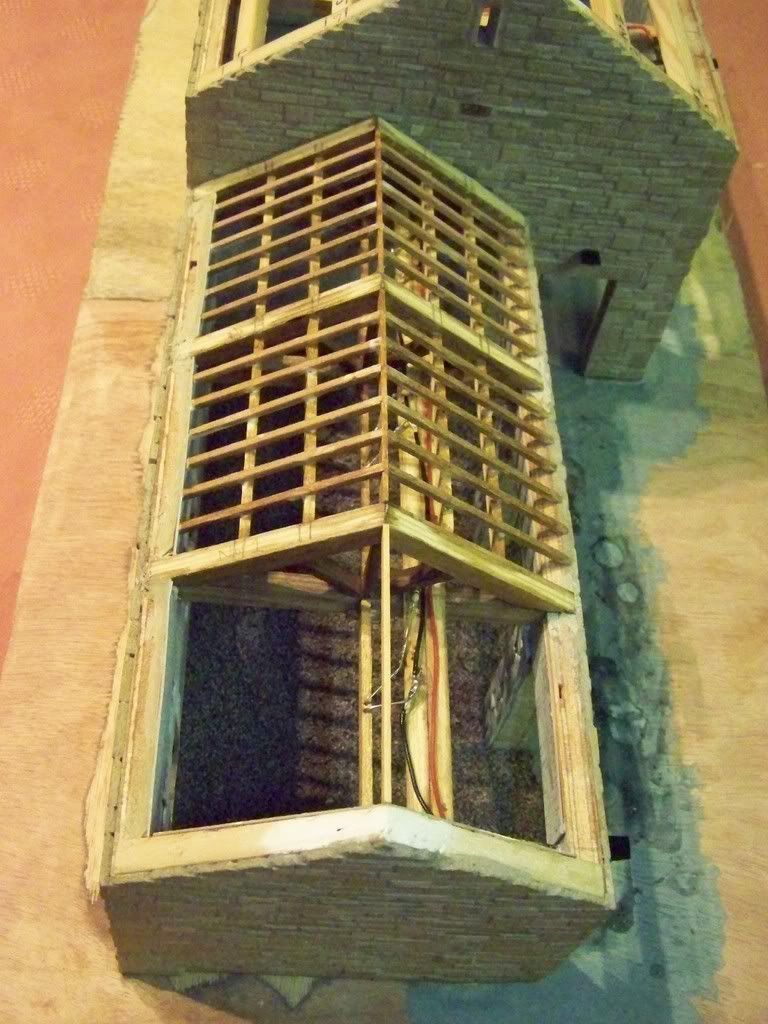
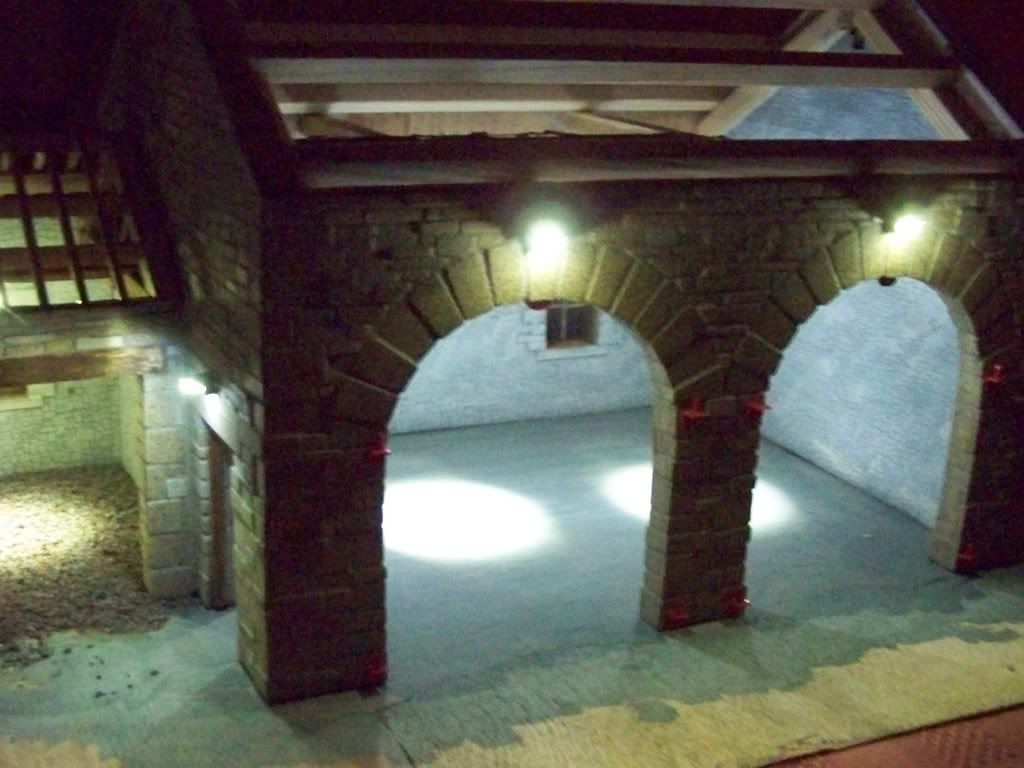
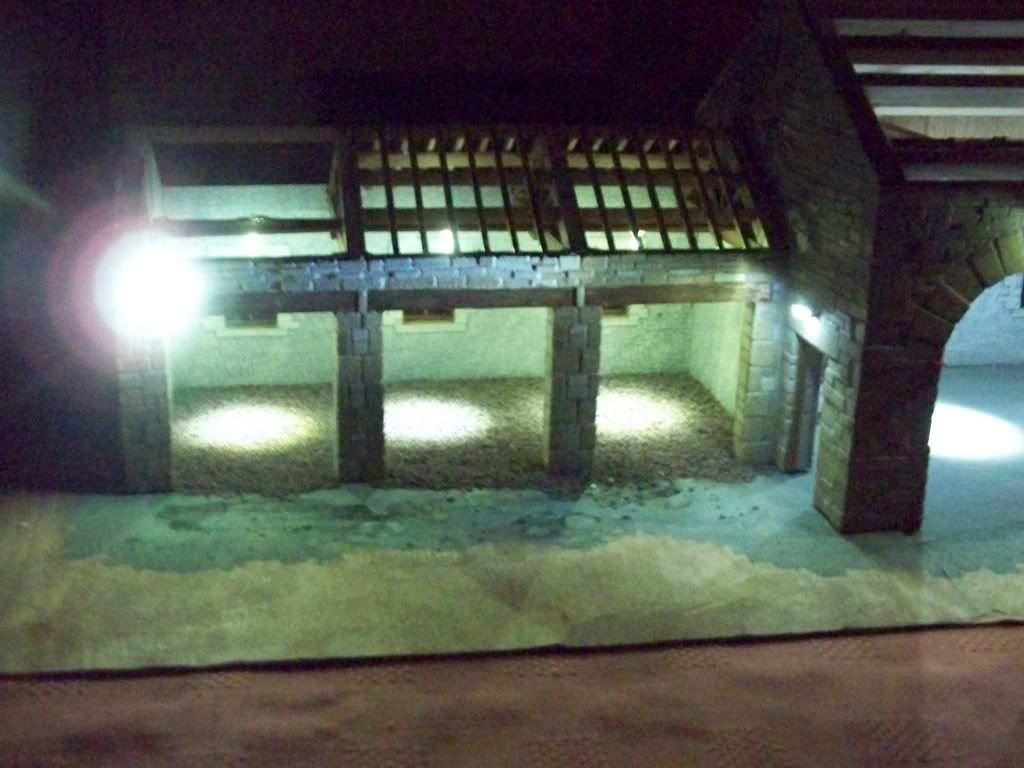
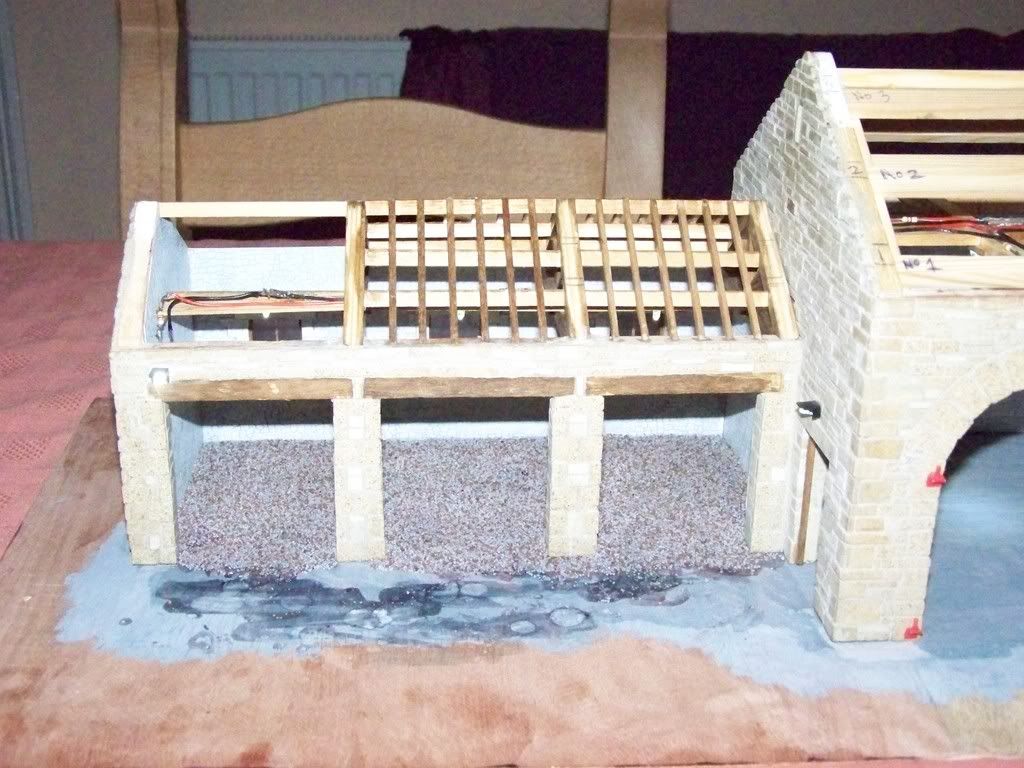
Latest pictures of the stone building...Windows in, lights in and working, hinges for barn doors made..barn doors made and all ready to go on... Roof trusses fixed, purlins and spars going on nicely - nearly ready for slats and slating....
-
When the owner of the real Roadless Super Major bought it from Southampton, it was in a sorry state. It was only 2-wheel drive, but was actually a 4-wheel drive, as it had the sandwich still in it.
He completely refurbished the engine and all other parts as needed, removed the non-original cab, then gave the whole lot a re-spray. The bonnet was re-sprayed orange to give a more industrial look to the tractor.
All this work was done just prior to the 2005 National Tractor Run at Gisburn. In fact if you have a copy of the Tractor Run DVD you will see this tractor a couple of times.


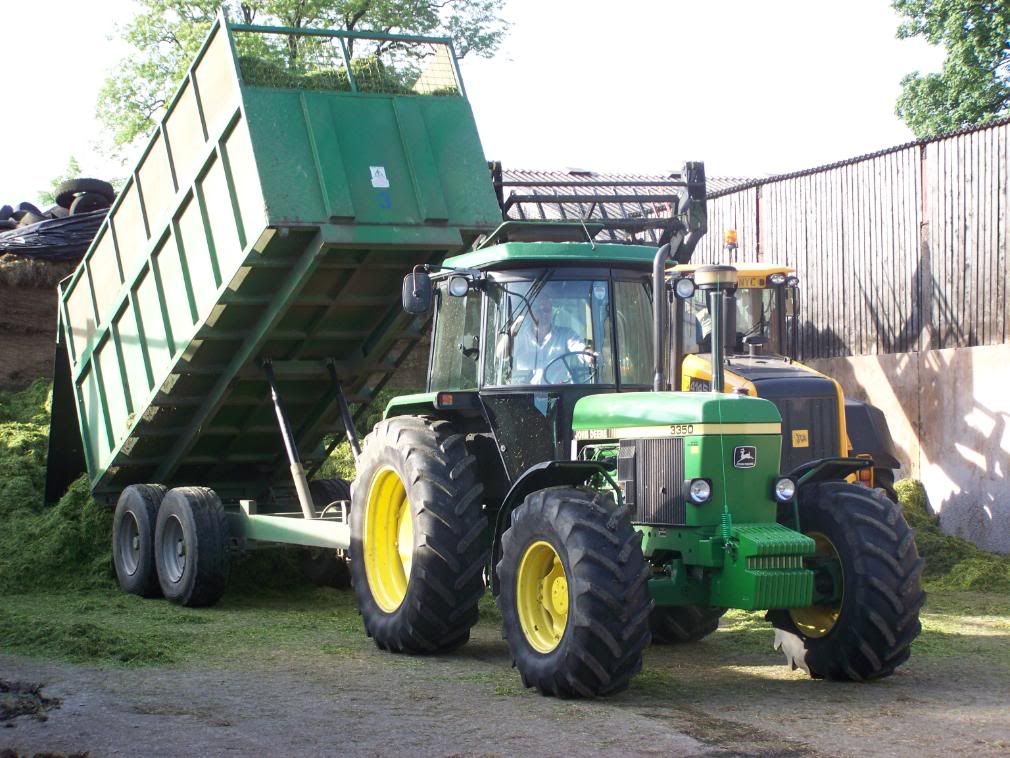
Keep the old ones working...
in Tractors
Posted
Just to prove that the old ones can still do it...they can still give the young pups a run for their money...these ones are in regular work. The 3350 works everyday and earns its keep! The 4000 Four can still put in a good days work as well..